Amy's Nerdy Corner🡾
Home
Posts
Physics
Jubeat
Sound Voltex
BMS Tables
MT:The Dream
OPTCG
GY Law
GY Law: A Learner's Reference
🡮 authored by Amy & Shimona | contributors: Swagzaur
🡮 *reviewers: *
This article serves as a starting point for players new to the deck and those looking to start playing, as well as a reference. Since the deck is considered to be fairly difficult to play and does not have a strict curve, it can be hard to figure out its most effective strategies and playlines, and how each card is used optimally against certain opponents. Firstly, the philosophy of the deck is discussed, after which a list of relevant cards to the deck is provided, with a description accompanying most of them. It should be noted that nicknames have been assigned to most cards for easier reference throughout the document. Finally, gameplay strategies and certain matchups are discussed. This article is not a strict guide per se, but rather elaborates on the deck and its package’s effects and strategies, and how they can be used. The authors will do their best to update this work until otherwise specified. Its first iteration was written during OP15 and early OP16.
This resource is not to be used during games in any way, shape or form!
Changes and additions can be suggested by submitting a Pull Request, writing an issue, or sending a message to mobiuslau on Discord.
Changelog: page history, cardlist history.
Acknowledgements
We would like to thank Swagzaur for their contributions to the description of ILY. Furthermore, we would like to thank the GY Law community in the respective channel from the One Piece Trading Card Game Community Discord server. The discussions there have provided us with much valuable insight, not only for learning the deck, but also for helping each other improve and truly understand it and its position in the landscape of matchups. This article contains our culminated knowledge about this leader obtained from these discussions and many games.
Table of Contents
1. Philosophy of the Deck
1.1. The Leader Ability

Even though this leader has a single Activate:Main effect, henceforth referred to as LA, it can be thought of as having 2 separate abilities and a side-effect. If a DON!! is given to the leader, and the total cost of the player’s characters on the board is 5 or more, once per turn:
-
A character can be bounced from the board to hand.
This is the activation cost of the LA, a somewhat powerful ‘ability’ on its own that is regularly used during a game, almost as often as every turn. On the surface, it may not sound interesting or strong to bounce a character, perhaps weak even. There are multiple reasons why this is somewhat strong, however. Firstly, it allows forOn-Playabilities from a single card to be used multiple times per game, provided there is enough DON!! to play the character again afterwards. This is particularly useful with searchers, which are thus typically used multiple times per game. As long as a single copy of a particular card remains in play, this ‘ability’ allows for thisOn-Playto be fired multiple times per game. Secondly, it can be used to make space for other characters if the board is full. This prevents the cards from being trashed. Lastly, it can help keep the hand healthy with counter cards. Important characters such as Bege can be used as counter after they have been used for their primary purpose. -
A 5c or less
Supernovascharacter can be played from life.
This allows for an extra character to enter the board without spending its cost, significantly increasing tempo. It is typically done only once or twice per game, mostly during the early mid-game, since effectively a life is traded for the ability to play a body, making life more vulnerable. Thus, only 5cSupernovascharacters are usually worth playing from life this way. Healers such as 7c, Femlaw, and Borsa mitigate this vulnerability such that this ability could be used during a turn in or before which a healer is played without losing net life, therefore allowing more aggressive plays during a game. Still, this ability is typically used once, perhaps twice if aggression is vital for winning, during the mid-game without breaking even on life, typically during the 4d, 5d, or 6d turns. It may also be used during lethals to fire the effect of a character card cheaply without expecting survival, such as playing Stunbon to stun aBlocker, which even restands the DON!! used to stack it in life with Bege.
🡪 The side-effect is that the top of life is revealed.
This is not as impactful in each game. However, it can be incredibly valuable to remember which card is at the top of life. It can help determine whether survival is possible in the context of counter. Moreover, if a critical card is in life, a stacker like Bege can be used to grab it. Since the top of life is revealed, opponents have access to the same knowledge as well and can therefore make the same calculations as the player.
These ‘abilities’ make for an incredibly flexible leader, which plays an equally flexible Supernovas package with a few guests. Cards move often between the hand, life, and character areas.
1.2. Game Plan
The goal of the deck is to outtempo the opponent by cheating out bodies to make explosive, and DON!!-efficient plays while disrupting the opponent’s game plan. It typically creates a strong, wide board rather quickly, with characters of 6k power or more during the mid-game. As such, it can be played somewhat aggressively, but it has tools to sustain a longer game, though typically the end-game is not as strong as that of other decks, such that most tempo is gained during the mid-game.
The early game usually involves searching heavily to find vital pieces, such as 5c Supernovas and cards that set up life. Searchers will contribute to the LA’s requirement of having a total cost of 5 on the board. The goal here is to establish a 5c body as early as possible, typically Cavendish, which allows for an additional 2 DON!! to be used every turn, enabling the highly DON!!-efficient plays this deck is known for. Going 2nd, this is possible as early as during the 4d turn, in which Cavendish, or any other 5c Supernovas for that matter, can be played from life. Going 1st, the most optimal scenario is for Cavendish to be played raw and another 5c Supernovas from life during the 5d turn.
During the mid-game, a wider board is built by utilising the LA and pieces like 6c Law that cheat out bodies. Stunbon can be used to hinder enemy swings or blocks, and Freezebon to prevent the opponent from playing their vital turns correctly by freezing their DON!!. This deck can quickly run out of steam, so it is important to plan an out during the mid-game.
In the late-game the focus is usually set on finding a way to go for lethal quickly. If that isn’t possible, it is instead possible to stall by utilising stunning, freezing and healing. The deck has the tools to do both, but it is not capable of playing big, scary characters to strengthen the board unless a card like Law & Bepo is included as tech.
Since a lot of focus is placed on building a strong board during the early- and mid-game, it is vitally important that it is well protected with counter and board-protection cards. It can be incredibly difficult to rebuild a strong and healthy board later in the game. Cavendish is often the target for swings and removal effects, therefore having priority for protection. The deck is rather good at developing a healthy hand early, though, to help counter board swings. Decks focused on removal and board control are typically tough opponents. Keeping removal-protection throughout the mid-game is vital in such matchups.
1.3. Difficulty
GY Law is one of the more difficult decks to pilot. The reasons are outlined here not to discourage new players, but to help understand some of the things GY Law players consider when playing the deck, hopefully leading to educated decision-making during games. Some of these points are not necessarily unique to this deck, but are still worth mentioning.
🡪 The deck is fairly fragile.
Playing a body using LA essentially reduces life, making the deck fragile almost by definition. It has tools to mitigate this, such as ones which stun or freeze bodies, or bodies which gain Blocker when on 1 life. As such, this deck is not too uncomfortable on a low amount of life, but is still rather vulnerable. Particular mistakes can quickly prove to be lethal for the player.
It requires good knowledge of the game.
This deck is rather flexible, such that it benefits greatly from the player knowing the mechanics and rules of the game very well to exploit them. Every aspect of the game’s mechanics should be optimised to increase the chance of success with the deck. Moreover, the player should be able to evaluate their tempo relative to the opponent well during each point in the game to make well-educated decisions. In principle, these points are not unique to this deck, as any deck benefits greatly from good knowledge of the game.
🡪 A good understanding of the opponent’s deck is essential.
An important part of the game plan is to disrupt the opponent, and this deck provides useful tools to do so. As a result, it is vital to sufficiently know the game plan and serious threats of the opponent, so that the right tool can be used and the right play can be made at the right time. Moreover, knowing the strengths and weaknesses of the opponent leads to better decision-making on defensive and offensive strategies and which of the many to employ in the moment. Since this deck is rather fragile and does not have many tall bodies, it is key to play to the opponent’s strengths and capitalise on their weaknesses. Lastly, by knowing the opponent well, the right turn order can be chosen. This deck does not necessarily have a large preference for starting either first or second. As a result, it is often more effective for players to pick the opponent’s preferred turn order. In a particular sense, this deck is both proactive and reactive.
🡪 It is a toolbox deck.
The deck does not include many by-definition strong cards. Most of its roster consists of cards with particular beneficial effects, its tools, chosen to be included based on the strong decks in the current landscape. Hence, toolbox deck. It does not play many proactive strong cards, but rather includes the tools specifically to increase tempo against strong decks currently played. A clear example is the inclusion of Promo Kid when Green Zoro was a strong, prominent deck in the landscape.
🡪 This deck searches, a lot.
Searchers play a vital role in finding the right tool for the right time. Not only is the number of searchers in the deck typically high, but they are also often bounced and replayed, such that this deck searches almost every turn. A lot of cards are seen this way, making this deck rather consistent. The difficulty lies in understanding which of the many cards to search for or pick. Different opponents and situations call for different tools. Being able to think ahead is incredibly valuable for this deck.
🡪 There are many different playlines and combos it can play.
It thrives off a creative mind that can come up with DON!!- and hand-efficient yet effective playlines and combos. It doesn’t necessarily have a strict curve past the early game, typically after the 5d or 6d turns. Since many options are presented to the player, it can be rather overwhelming at times to pick the right ones or come up with one to begin with.
🡪 It can be exhausting to play many games, such as during regional-level tournaments.
Typically, sufficient consideration is put into each turn and each of the many actions this deck performs. This may be exhausting relatively quickly for newer players and even some veteran players.
It will take time to understand the deck, its playlines, and what plays are strong against various opponents. As a result, however, being victorious after playing an intricate dance with the pieces is incredibly rewarding, leaving the player longing for more.
2. The Deck
2.1. Structure
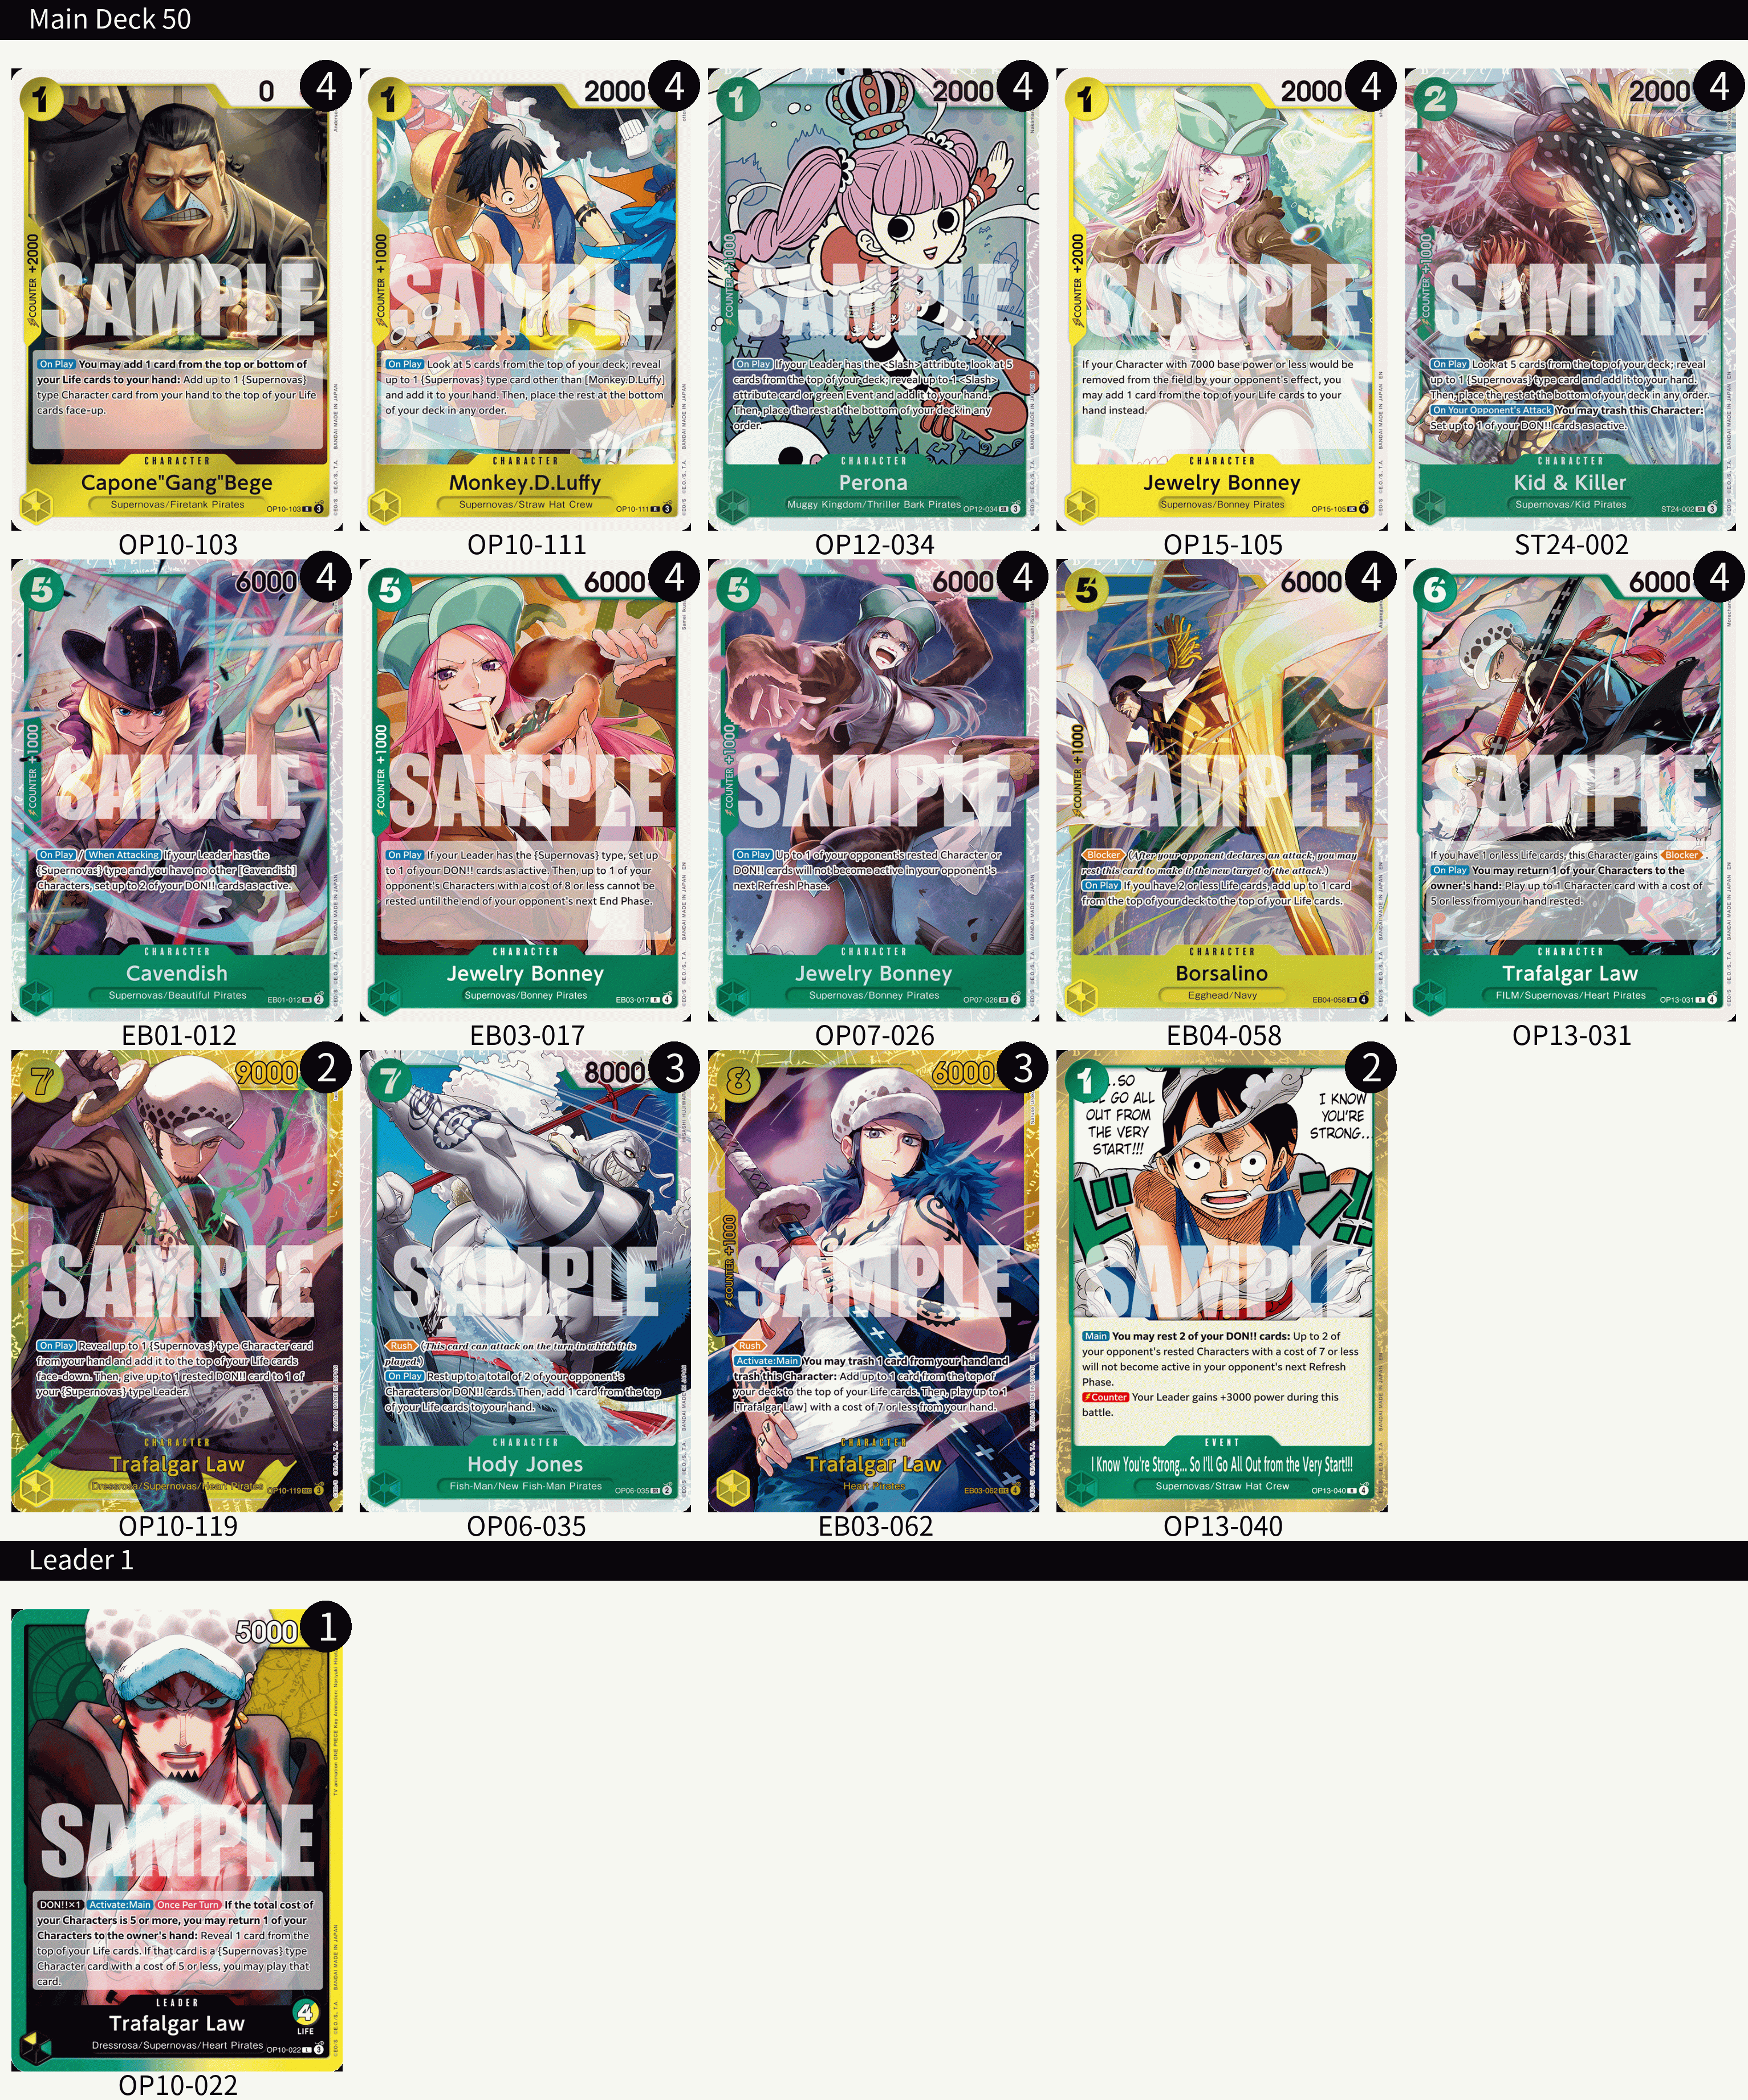
A basic list for this deck typically includes the following:
-
12 searcher cards.
Searchers are the bread and butter of the deck, since they allow the player to find the right pieces at the right time. Having more searchers, therefore, improves the consistency of the deck and increases the probability of finding one or more in the opening hand. 12 is a good balance between the number of searchers and the searchable pieces. Having 10 or 11 searchers is playable, but often less desirable by most current players. -
8 to 12 2k counter character cards.
It is vital to protect the board after it is established and to keep the tempo. 12 is the most comfortable amount, but it is possible to include fewer, though no fewer than 8. -
A minimum of 11 or 12 LA targets, i.e. 5c
Supernovastype cards.
Cheating out 5 cost characters with LA or 6c increases tempo massively. As such, it is desirable to include enough targets for these abilities. -
2 to 4 finisher cards.
These cards greatly aid with, or create the opportunities for, lethal turns to win the game. 2 or 3 are the most common amount.
Decklists may vary from player to player. Since this is a toolbox deck, suitable tools should be chosen for the environment in which the deck will be played, from locals to regional-level tournaments. It may have to face different opponents at different events.
It can be helpful to deckbuilders to make educated decisions on the amount of a particular card included based on the Hypergeometric Distribution, which is used to calculate the probabilities of sampling without replacement1. In the context of the game, it can be used to calculate the probability of finding one or multiple of a particular card (successes) after some number of draws (sample) from the deck (population). The equation is not given here, but it can be found in David M. Lane et al.1. An online calculator may be used to evaluate such probabilities2.
2.2. Suitable Cards
Suitable cards for the deck are categorised and listed below. “Number of copies” denotes the number of copies of a particular card that are typically played or seen in lists, which, in principle, can be deviated from.
2.2.1. Core Pieces
Of the following cards, 4 of each must be included in the deck. This is not negotiable.
 🡮 Capone”Gang”Bege Bege
Bege is one of the most important cards in the deck. For only 1 DON!!, it can stack life with a card from hand, which can then be played out using LA. When bounced back, it even doubles as a 2k counter card, which can be pitched to protect the board later on. Since a card is taken from life to hand as part of its cost requirement, it can be used to grab a known card from life if this card is crucial for a win, such as Hody or DMG.
Number of copies: 4.
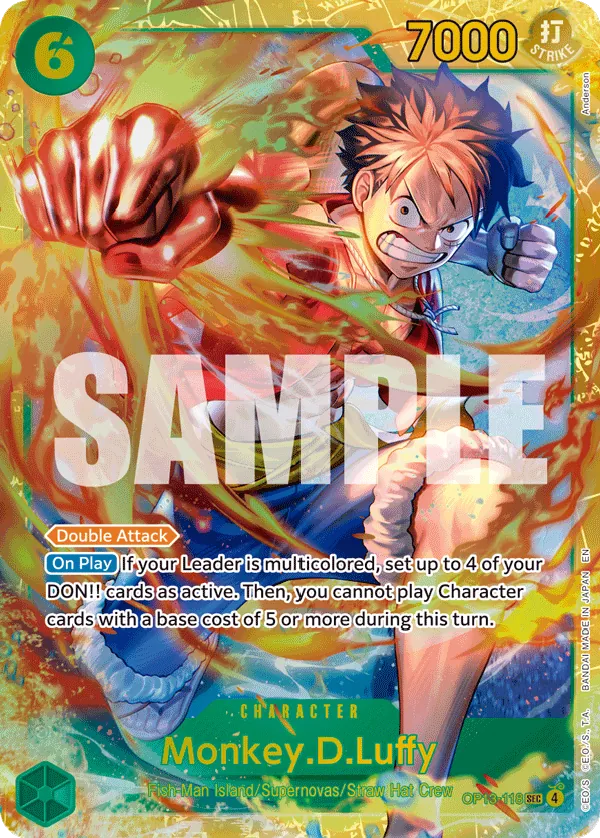
 🡮 Monkey D. Luffy Luffy
The basic yet fantastic searcher in the deck. Search any Supernovas type card except itself for 1 DON!!, and it has 1k counter. It being so cheap makes it ideal to loop with.
Number of copies: 4.
 🡮 Kid & Killer KnK
This searcher costing 2 DON!! on the surface seems much worse than Luffy. However, this cost significantly helps with trying to LA on the 4-DON!! turn going 2nd, since firing LA requires the characters in play to have a cumulative cost of 5 or more. As a bonus, it can even search itself, and the On Your Opponent's Attack effect has great synergy with counter-events such as DMG or All Out, such that the player can use all their DON!! during the main phase without having to worry about leaving a DON!! up to go defensive with a counter-event.
Number of copies: 4.
 🡮 Cavendish Cav
This is the engine of the deck. The 2 rested DON!! this effect restands enables the highly DON!!-efficient plays this deck is known for. As a result, it is the prime target for swings and removal effects from opponents. It is therefore of utmost importance to protect it, if possible, by countering swings or by using removal protection. The early-game often involves getting this card on the board as soon as possible. Optimally, it is played on 4d from life using LA when going second, and raw on 5d when going first.
Number of copies: 4.
2.2.2. Strong Mid-Game Pieces
The following cards either synergise well with the LA or each other, are strong in the landscape, or are abusable by the nature of this deck.
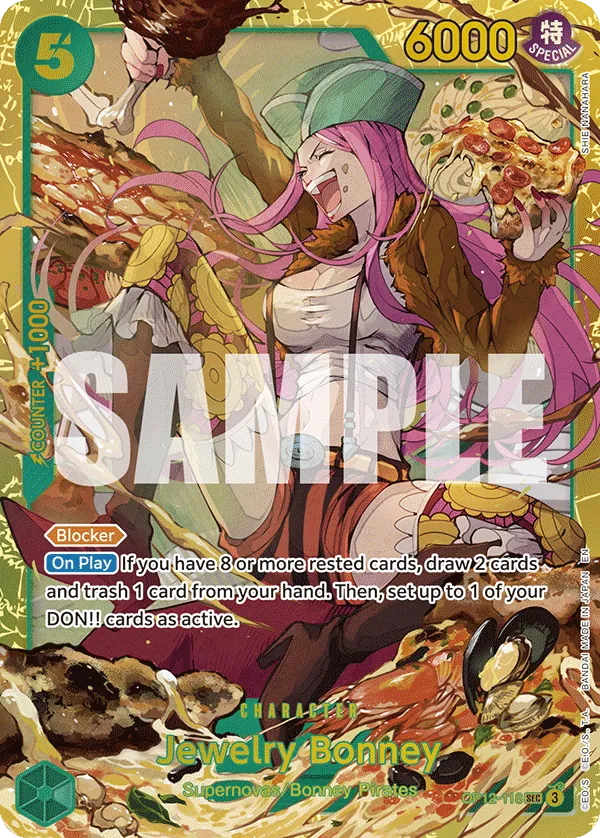
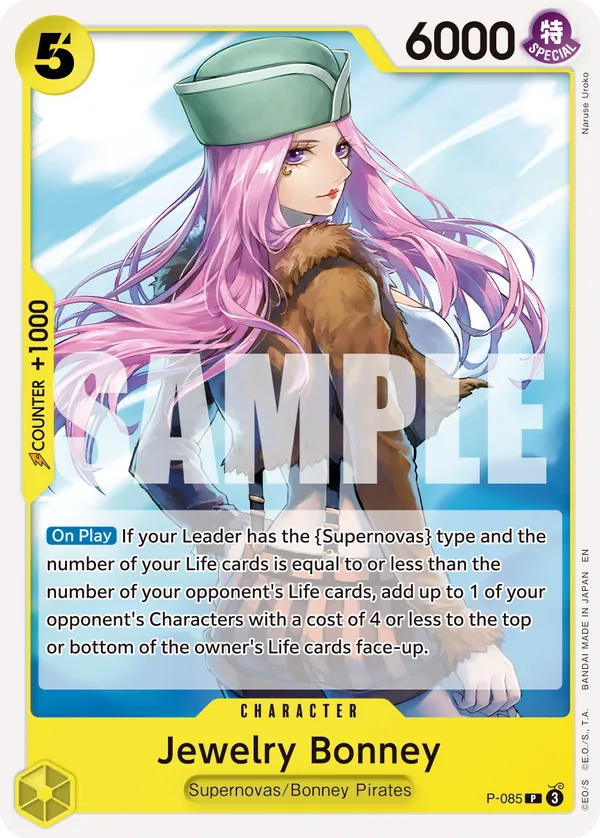
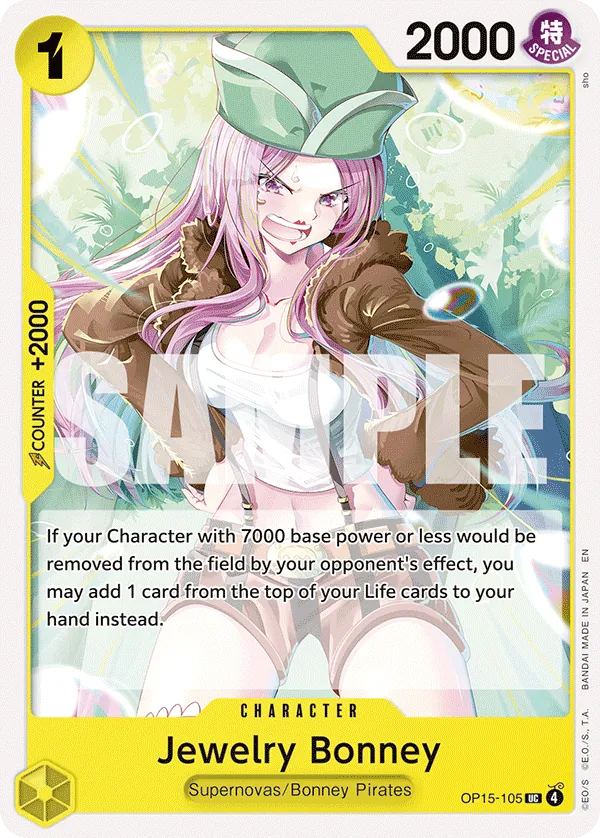 🡮 Jewelry Bonney 1c Bonney
This card is typically played right before the start of the mid-game against decks with removal effects to help protect pieces against them in the mid-game. Keeping pieces such as Cavendish on the board is often more valuable than the life this card requires to be taken to protect them, especially now that the deck is more capable of healing with Borsa and FemLaw in the pool. Since it has a low cost of only 1 DON!!, it is fairly easy to play out at any point in the game, and it can be used to help fulfil the LA’s cost requirement in the early-game when going second. This being a searchable 2k in addition makes it a great utility card. It is often bounced back later into the game, both to make space for bigger bodies if it is safe to do so, and to gain a 2k counter card back in hand.
Number of copies: 4.
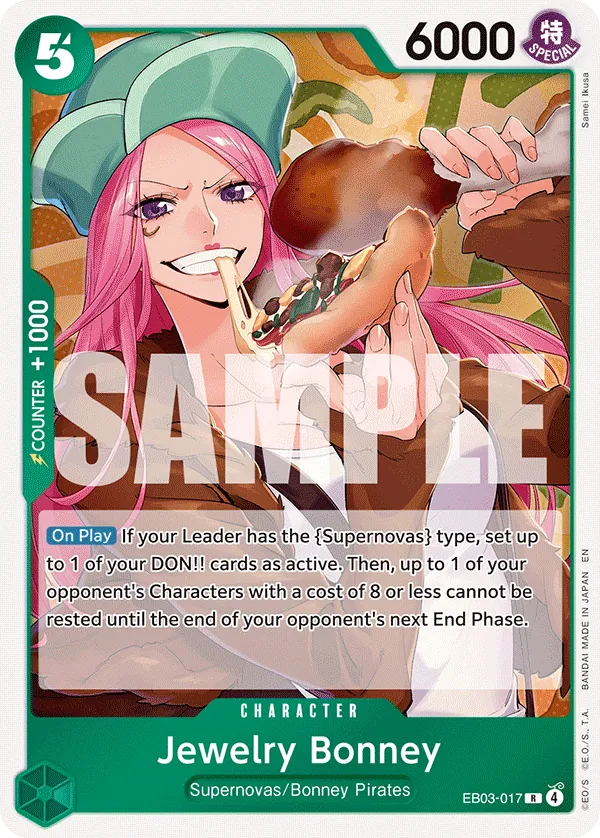 🡮 Jewelry Bonney Stunbon
Stunning is the new removal. This card is often the next prime target for LA or 6c if Cavendish is already established. This deck’s LA makes it rather fragile on life, so a 6k body which stuns another body before it can even swing helps to reduce pressure on life and the board, as well as slow down the opponent by denying When Attacking effects. Being able to stun 8c or lower bodies is quite strong; the range is quite large. Moreover, it can be used to stun blockers during lethal or other aggressive turns. Prime targets would, for instance, be 4c Cavendish, 7c Sabo, or 6c Enels.
Number of copies: 4.
 🡮 Jewelry Bonney Freezebon
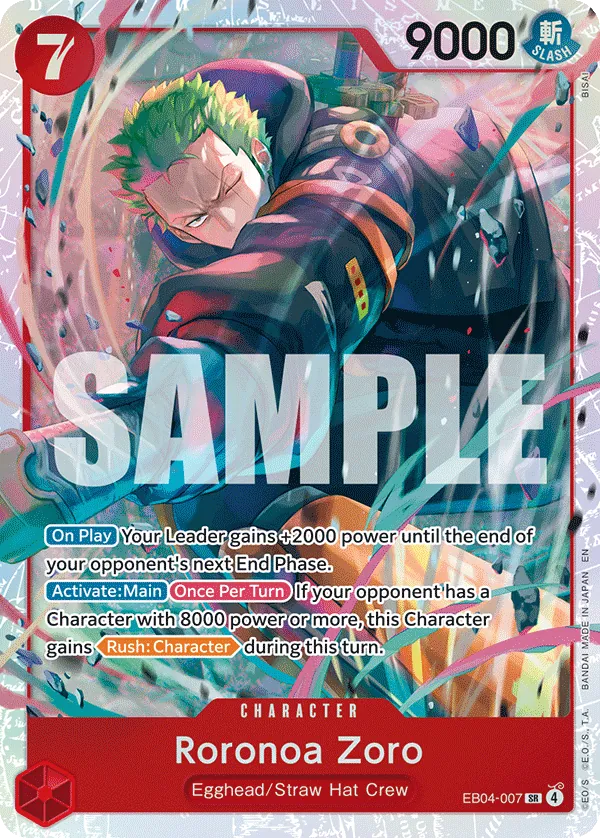
This card packs quite the utility punch when played at the right time. Freezing a DON!! can deny the opponent strong plays or turns, slowing them down or outright preventing them from going for lethal. Examples of strong DON!!-freezing plays are denying 7c Zoro to prevent the opponent’s leader from gaining +2k power, the 8c I Am Whitebeard event, or 10c Roger. Moreover, it is one of the only tools this deck has which can keep bigger characters in check.
Number of copies: 2 to 4.
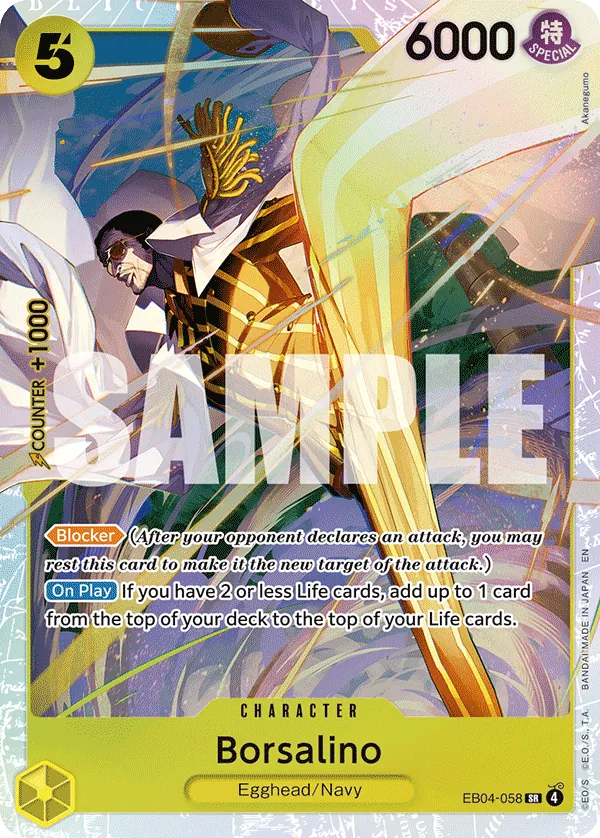 🡮 Borsalino Borsa
Borsa is already one of the strongest cards in the general pool, but in this deck, it can be even more abused. It can be played out with 6c, allowing for quite the explosive turns, as one can use LA afterwards to play another body without a net loss in life. Once on the board it can be bounced back by 6c or using LA to then be played again either raw or using 6c. The life-gain aspect is already strong, but it’s a blocker as well, and even has 1k counter to top it off. Ah, Bandai, you shouldn’t have.. It is unfortunately unsearchable.
Number of copies: 0 or 4.
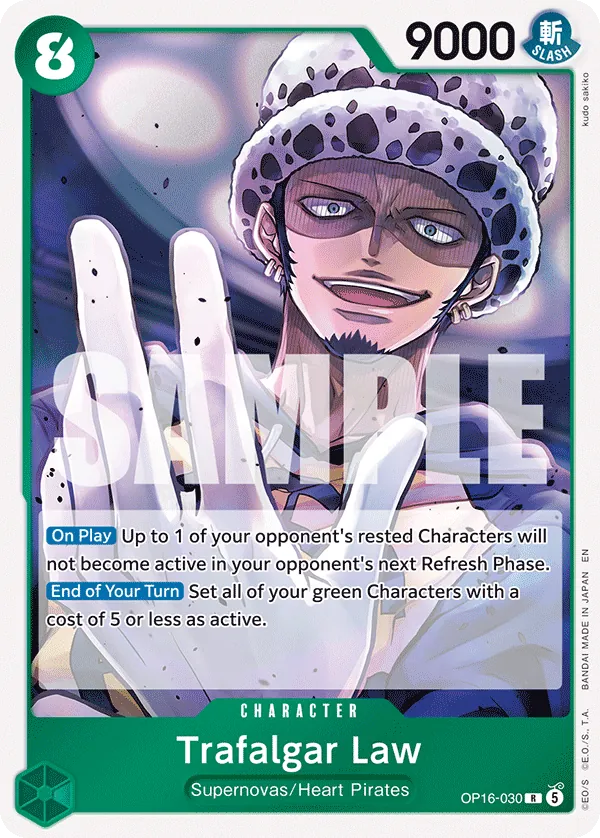
 🡮 Trafalgar Law 6c
This card is, in a way, LA without needing to take a life. Bounce a body, then play one rested, enabling quite the explosive turns. 6c can also be interpreted as a card which allows for an On Play from a body on the board to fire again by bouncing and replaying it. Cards coming into play rested is not necessarily an issue, as this deck keeps a fair amount of counter power in hand due to the large amount of bouncing, and Cavendish is usually a more attractive target for swings. 6c is, moreover, a blocker when the player has 1 or fewer life, helping with survivability. This can, however, lead to anti-synergy with cards that heal, such as Borsa or FemLaw, which should be kept in mind.
Number of copies: 2 to 4. Usually balanced with 7c.
 🡮 Trafalgar Law 7c
7c is similar to 6c in the way it allows for a body to be cheated out without losing net life. The difference being that it trades the Blocker ability and the possibility of replaying characters on the board in exchange for a stronger stat line useful in matchups which require larger bodies, as well as giving a rested DON!! to lead. This makes it a great play on 7d and 8d since it establishes a big body in time for a lethal turn and can play out a Stunbon or Freezebon to slow down the opponent. Do note that it isn’t required to use LA to play the stacked body from life, meaning that 7c can also be used as a regular healer. The high stat line makes this card vital in matchups where the deck’s 5c bodies will struggle to swing into the enemy leader, like UY Nami or RY Bonney.
Number of copies: 0 to 3. Usually balanced with 6c.
 🡮 Trafalgar Law FemLaw, Fem
An excellent card that plays into the deck’s combo-heavy identity. On 8d, 9d, or 10d, where often 6c or 7c would be played, FemLaw allows for exactly that with the extra benefits of healing a life and an extra swing thanks to the card’s inherent Rush ability. This puts more pressure on the opponent, possibly setting up lethal, while increasing the chance of survival for the coming turn. Requiring a card to be trashed from hand might seem like a high price, but the deck’s ability to search heavily at the start of the game should provide enough resources to compensate. If survival needs to be ensured, double healing is an option either through playing 7c out of FemLaw or 6c into Borsa. Including at least a cumulative total of 5 6c’s and 7c’s in the decklist ensures that FemLaw consistently has targets.
Number of copies: 2 to 4. Perona can be used to find it.
 🡮 Trafalgar Law 8c, Exam Law, Glove Law
GY Law typically develops a wide board of 5c and higher bodies, which are often swung with. This card’s End of Your Turn effect protects some of them, most notably Cavendish, from attacks, alleviating a significant amount of board pressure, and prevents them from being frozen by events such as Electrical Luna. This may result in more pressure on life, however. 6c or higher characters, also often played, are not protected in this way, such that this effect is most useful when most of the bodies on the field are green 5c or lower. Moreover, this effect enables 5c 6k blocker bodies, such as Secbon, to swing more often, since they can block on the following opponent’s turn as well due to this effect. Additionally, the On-Play effect is strong, disrupting the opponent during the later stages of the game when otherwise Stunbon or Freezebon would have been strong. It unfortunately has a cost of 8, such that it sees play mostly later in the game, and can not be played from Fem.
Number of copies: 0 to 2.
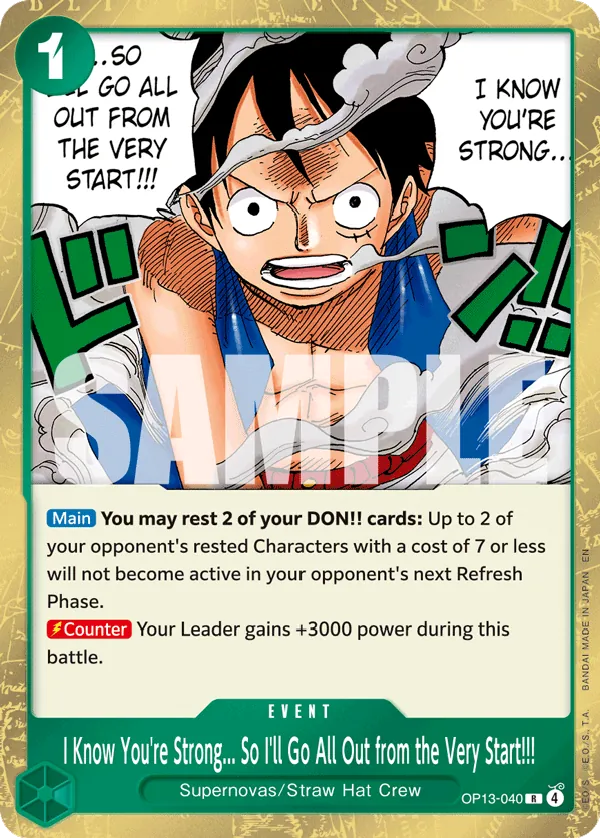 🡮 I Know You’re Strong… So I’ll Go All Out from the Very Start!!! All Out
All Out has become a staple for its ability to play into the deck’s recently improved capability of freezing and stunning. A large part of the meta utilises important pieces which cost 7d or less, such as OP15’s Blocker Sabo or purple Enels. This makes it easy to often get incredible value out of this event. It can be used as a defensive tool by disabling strong bodies, or offensively by freezing Blockers to set up lethal the following turn. Pair this with Stunbon and Freezebon to disable 3 characters at once. Lastly, It can be used as a 3k counter in tough situations, synergising well with KnK.
Number of copies: 0 to 3
2.2.3. Finishers
Comparisons between Hody and DMG are often made, sometimes leading to (heated) discussions. Each has its own strengths and weaknesses, such that different builds or landscapes call for one or the other.
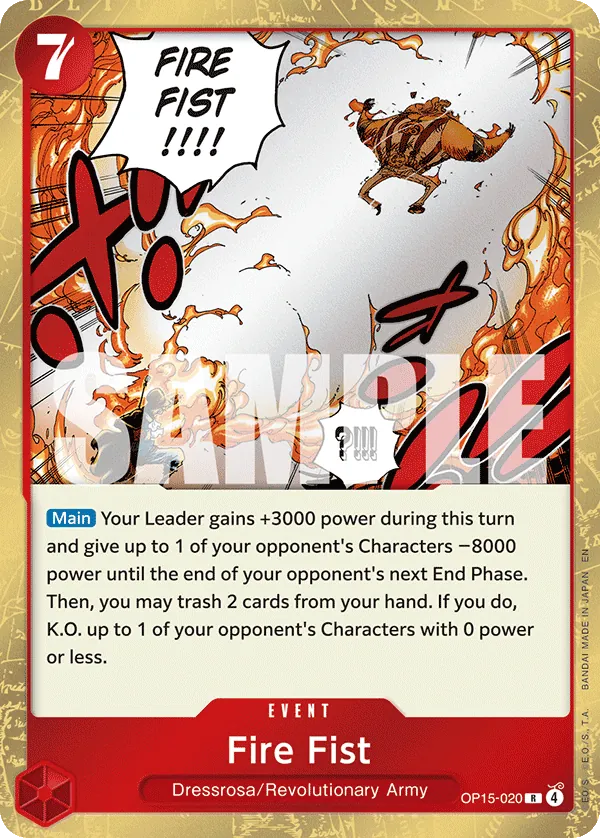
 🡮 Hody Jones Hody
For the price of 7 DON!! and 1 life (notably not 1 damage), 2 blockers or DON!! cards can be rested, and an extra 8k swing is obtained, often enabling an attempt to swing for lethal. In combination with Cavendish, Hody becomes relatively cheap to play for the benefits it brings. It is generally strong when the player needs to swing wide, as less DON!! is available to swing tall. It is often played to win the game on the spot without ensuring survival, since a life is taken from the On-Play effect. When the attempt fails, yet the player does survive the following turn, LA allows for Hody to be played again, creating another opportunity to win the game. It is unfortunately unsearchable.
Number of copies: 0 to 4.
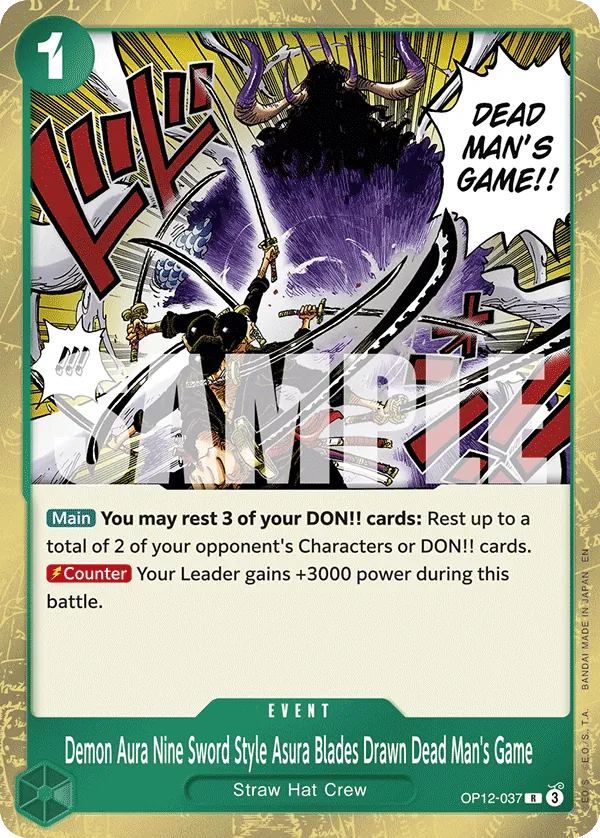 🡮 Demon Aura Nine Sword Style Asura Blades Drawn Dead Man’s Game DMG
DMG has a similar philosophy to Hody. It is often played as a finisher, but it can also be used to pressure board, or life, earlier in the game, since a life is not taken to hand as with Hody. Its main effect of resting 2 characters or DON!! cards is cheaper than playing Hody, making it more suitable when taller swings are required. However, it does not provide an extra swing like Hody would, such that a healthy board is required for DMG to be effective in the first place. It can notably provide 3k counter as well, in contrast to Hody being a brick, which can, however, only be used on the leader. This card is searchable through Perona.
Number of copies: 0 to 3.
2.2.4. Next Searcher Options
Often, the choice is presented between Bonney and Perona to fill out the searcher roster to 12 cards.
 🡮 Jewelry Bonney Bonney Searcher, Bonney
The next more obvious searcher candidate is Bonney, as it is a perpetual Supernovas searcher. If it sticks on the board, it continues to generate value by supplying the hand with relevant cards. This often makes it a target for swings, such that it takes the role of a pseudo-blocker in some cases. Bonney has multiple downsides, however. It being a perpetual searcher discourages bouncing it back for LA or 6c. Moreover, even though the cost to play it out is 1, it costs an extra DON!! to search with it, making it a 2c in disguise, which does not synergise well with the LA’s cost requirement.
Number of copies: 0 to 4.
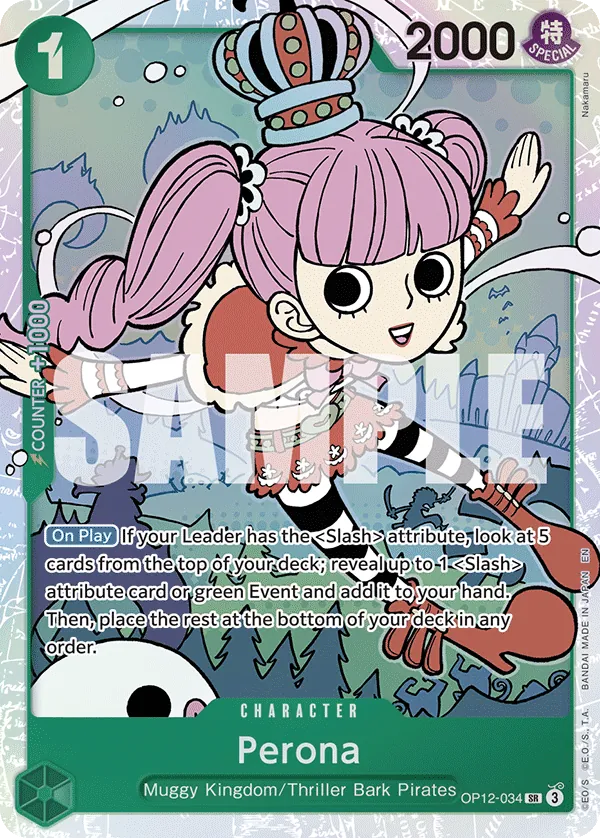 🡮 Perona
The benefits of including Perona are that it is the only searcher that can find FemLaw and any green event, and that it has a low cost of 1 DON!!, such that it is easy to play out anytime and can help to fulfil the LA’s cost requirement. Like Bonney, Perona has downsides. For starters, it does not find many essential cards in the deck, as not all cards have a Slash attribute. Moreover, it has relatively few targets, about 19 or 20 on average, making it prone to whiff.
Number of copies: 0 to 4.
2.2.5. Good Options
 🡮 Jewelry Bonney 3c Bonney
An incredible card for setting up Cavendish on 4d. It costs 3 DON!!, the crucial amount that leaves 1 DON!! for LA after stacking life, often with Cavendish. Moreover, it is a blocker, which helps to alleviate pressure from the opponent on their next turn(s), resulting in life being less fragile. It was quite a strong piece pre-rotation, as it could be played out of 5c during later turns. However, the only window in which this card is mostly realistically played now is during the 4-DON!! turn, such that it becomes a dead 1k counter card in hand most of the time. As a result, this card is seeing less and less play.
Number of copies: 0 to 4.
 🡮 Jewelry Bonney Secbon
Secbon is one of the only cards in the pool for this deck which can provide extra draw power, helping to find unsearchable cards. Since it is required to pitch a card after drawing 2, it can help cycle bricks from hand which aren’t needed anymore for the rest of the game. Its requirement of having 8 rested cards, DON!! and character cards, is not too difficult to satisfy on later turns by playing 6c, 7c, or FemLaw, and swinging with bodies, even searchers, first before playing this card. It is moreover a blocker, making it synergise well with Exam Law.
Number of copies: 0 to 4.
2.2.6. Next 2k Counter Options
 🡮 X.Drake Drake
Drake is one of the few 2k counter cards that are searchable by both the Supernovas searchers and Perona. It is a card that is not often played on the board, but can be extremely helpful in certain situations. In a pinch, it can rest chump blockers or critical pieces of the opponent, making them vulnerable to swings. In the early and mid-game, other plays are often preferable and effective, such that there aren’t many opportunities to play this card without 5c.
Number of copies: 0 to 4.
 🡮 Zeus
Zeus is the de facto removal card that yellow decks have access to. For the price of 2 DON!! and 1 life, it can remove any serious early or mid-game threats of 5c or lower, such as Holly. It is extra strong in this deck since it can be bounced back with LA. Taking a life in exchange seems costly. However, when taking into account that the swing the removed card would have generated could have resulted in the player taking one or more life either way, and that this deck has multiple ways to heal, it can often be more valuable to remove the threat on the spot rather than dealing with it on the board. It is, unfortunately, an unsearchable 2k counter removal card.
Number of copies: 0 to 4.
2.2.7. Tech or Rarely Seen But Still Options
 🡮 Capone”Gang”Bege 2c Bege
2c Bege is a pseudo-protector which discourages opponents from removing a body from the board when in play, as it would be placed into life instead. Pseudo-protector would be a fitting description since the to-be-removed body does not actually stay on the board. As a result, some amount of tempo is still lost, even though it synergises well with LA, as this deck prefers to have bodies on the field which can swing. That alone might discourage players from including this card. However, it is a chump blocker as well, making it a more useful inclusion. In the end, though, it is still seeing less and less play in favour of solely including 1c Bonney.
Number of copies: 0 to 2.
 🡮 Tashigi
This card saw a lot of play pre-rotation to protect the board from removal effects. It is, however, unfortunately unsearchable. It was still effective pre-rotation since it could be played out of 5c to avoid paying the steep price of 3 DON!!. Without 5c, there is little room to play this card due to its cost. Therefore, 1c Bonney is the preferred option currently.
Number of copies: 0 to 4.
 🡮 Eustass”Captain”Kid Promo Kid
Promo Kid briefly saw play as a tech option against G Zoro during OP13 when 6c was introduced, since 6c allows for Promo Kid to come into play rested, immediately satisfying its effect requirements. It is strong against G Zoro as it prevents the Zoro leader from attacking again, since it is not allowed to attack bodies of cost lower than 7 after its LA is activated. Since G Zoro is not as prominently played anymore, and other card options cover more matchups, such that the space in the deck is rather limited, Promo Kid is currently not seeing much play. Moreover, it is a brick, and is often more easily dealt with than before.
Number of copies: 0 to 2.
 🡮 Room
Room rarely sees any play nowadays, if at all. On the surface, its counter effect seems strong and synergises well with KnK. It helps mitigate swings into an important body, such as Cavendish, by restanding it whilst also providing 3k counter for the current swing. Note the following, however; restanding a character that is currently swung into with this counter effect does not stop the attack, since the check whether the character is rested occurs only once, namely in the attack step before the counter step, as per rule 7-1. The counter is only effective when the player has 1 or fewer lives, which in the current landscape does not occur as often. As a result, this card is often dead in hand during crucial moments when it would have been strong to play the card.
Number of copies: 0 to 4.
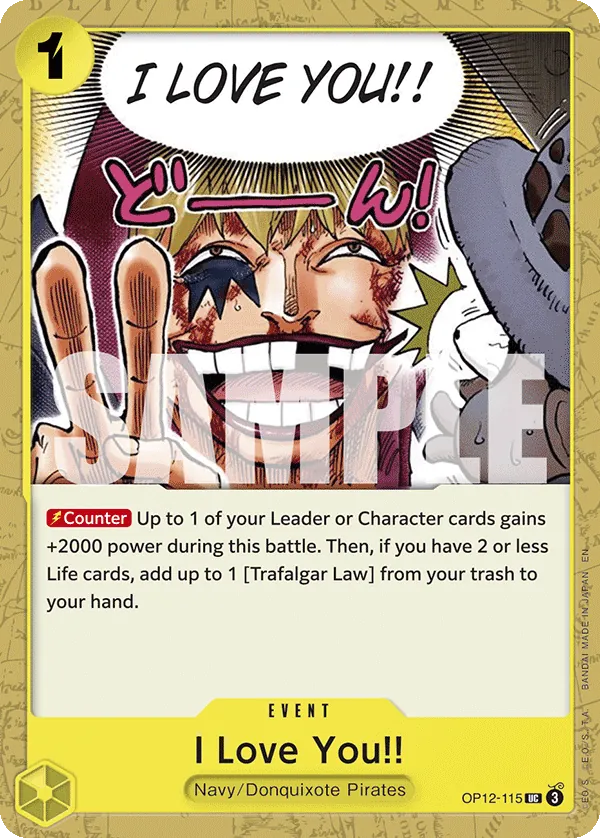 🡮 I Love You!! ILY
A counter event playable for free with KnK that, unlike DMG or All Out, can also protect one of the characters. When at 2 or lower life, it becomes hand neutral by grabbing a Trafalgar Law from the trash. Defensively, grabbing a Law with counter, such as 2k counter Law, complicates the opponent’s attacking math for the turn, while grabbing a Law that just blocked an attack, such as 6c Law, guarantees that it can be replayed next turn. Offensively, it can help stabilizing the gameplan by grabbing back a centerpiece Law, such as 8c Exam Law, after it was removed, or chaining 8c FemLaw after it trashed itself for continuous healing and rush pressure. It also synergizes with cycle, and therefore Secbon, by allowing a Law to be trashed without the risk of missing it later. The main disadvantage of this card is it being unsearchable, but can be run at any number as it is never a dead card in hand.
Number of copies: 0 to 4.
2.2.8. Rotated Pieces Which Are Dearly Missed
 🡮 Trafalgar Law Restand Law
Restand Law our beloved. This card was simply bonkers, turbo gas. In combination with Cavendish on the board, 6c, and/or Bege, this card could create the most explosive turns. The prime target to restand is Cavendish, as the When Attacking effect from it can then fire multiple times, resulting in incredible DON!! efficiency whilst pressuring the opponent hard with multiple 6k or bigger swings.
Number of copies: 0 to 4 in Extra Regulation. 
 🡮 Trafalgar Law 5c
Pre-rotation 5c was part of the core package of the deck. A 6k blocker body that cheats another 3c on the board is such an incredibly powerful inclusion to the deck, enabling highly explosive turns. It being a brick wasn’t necessarily an issue since this card would find its way onto the board one way or another. It enabled strong 3c or lower cards, such as 3c Bonney, Tashigi, or 2c Bege, to be included in the deck as 5c provided another window for them to be played. The combo possibilities were truly endless.
Number of copies: 2 to 4 in Extra Regulation.
2.2.9. Other Pieces to Consider


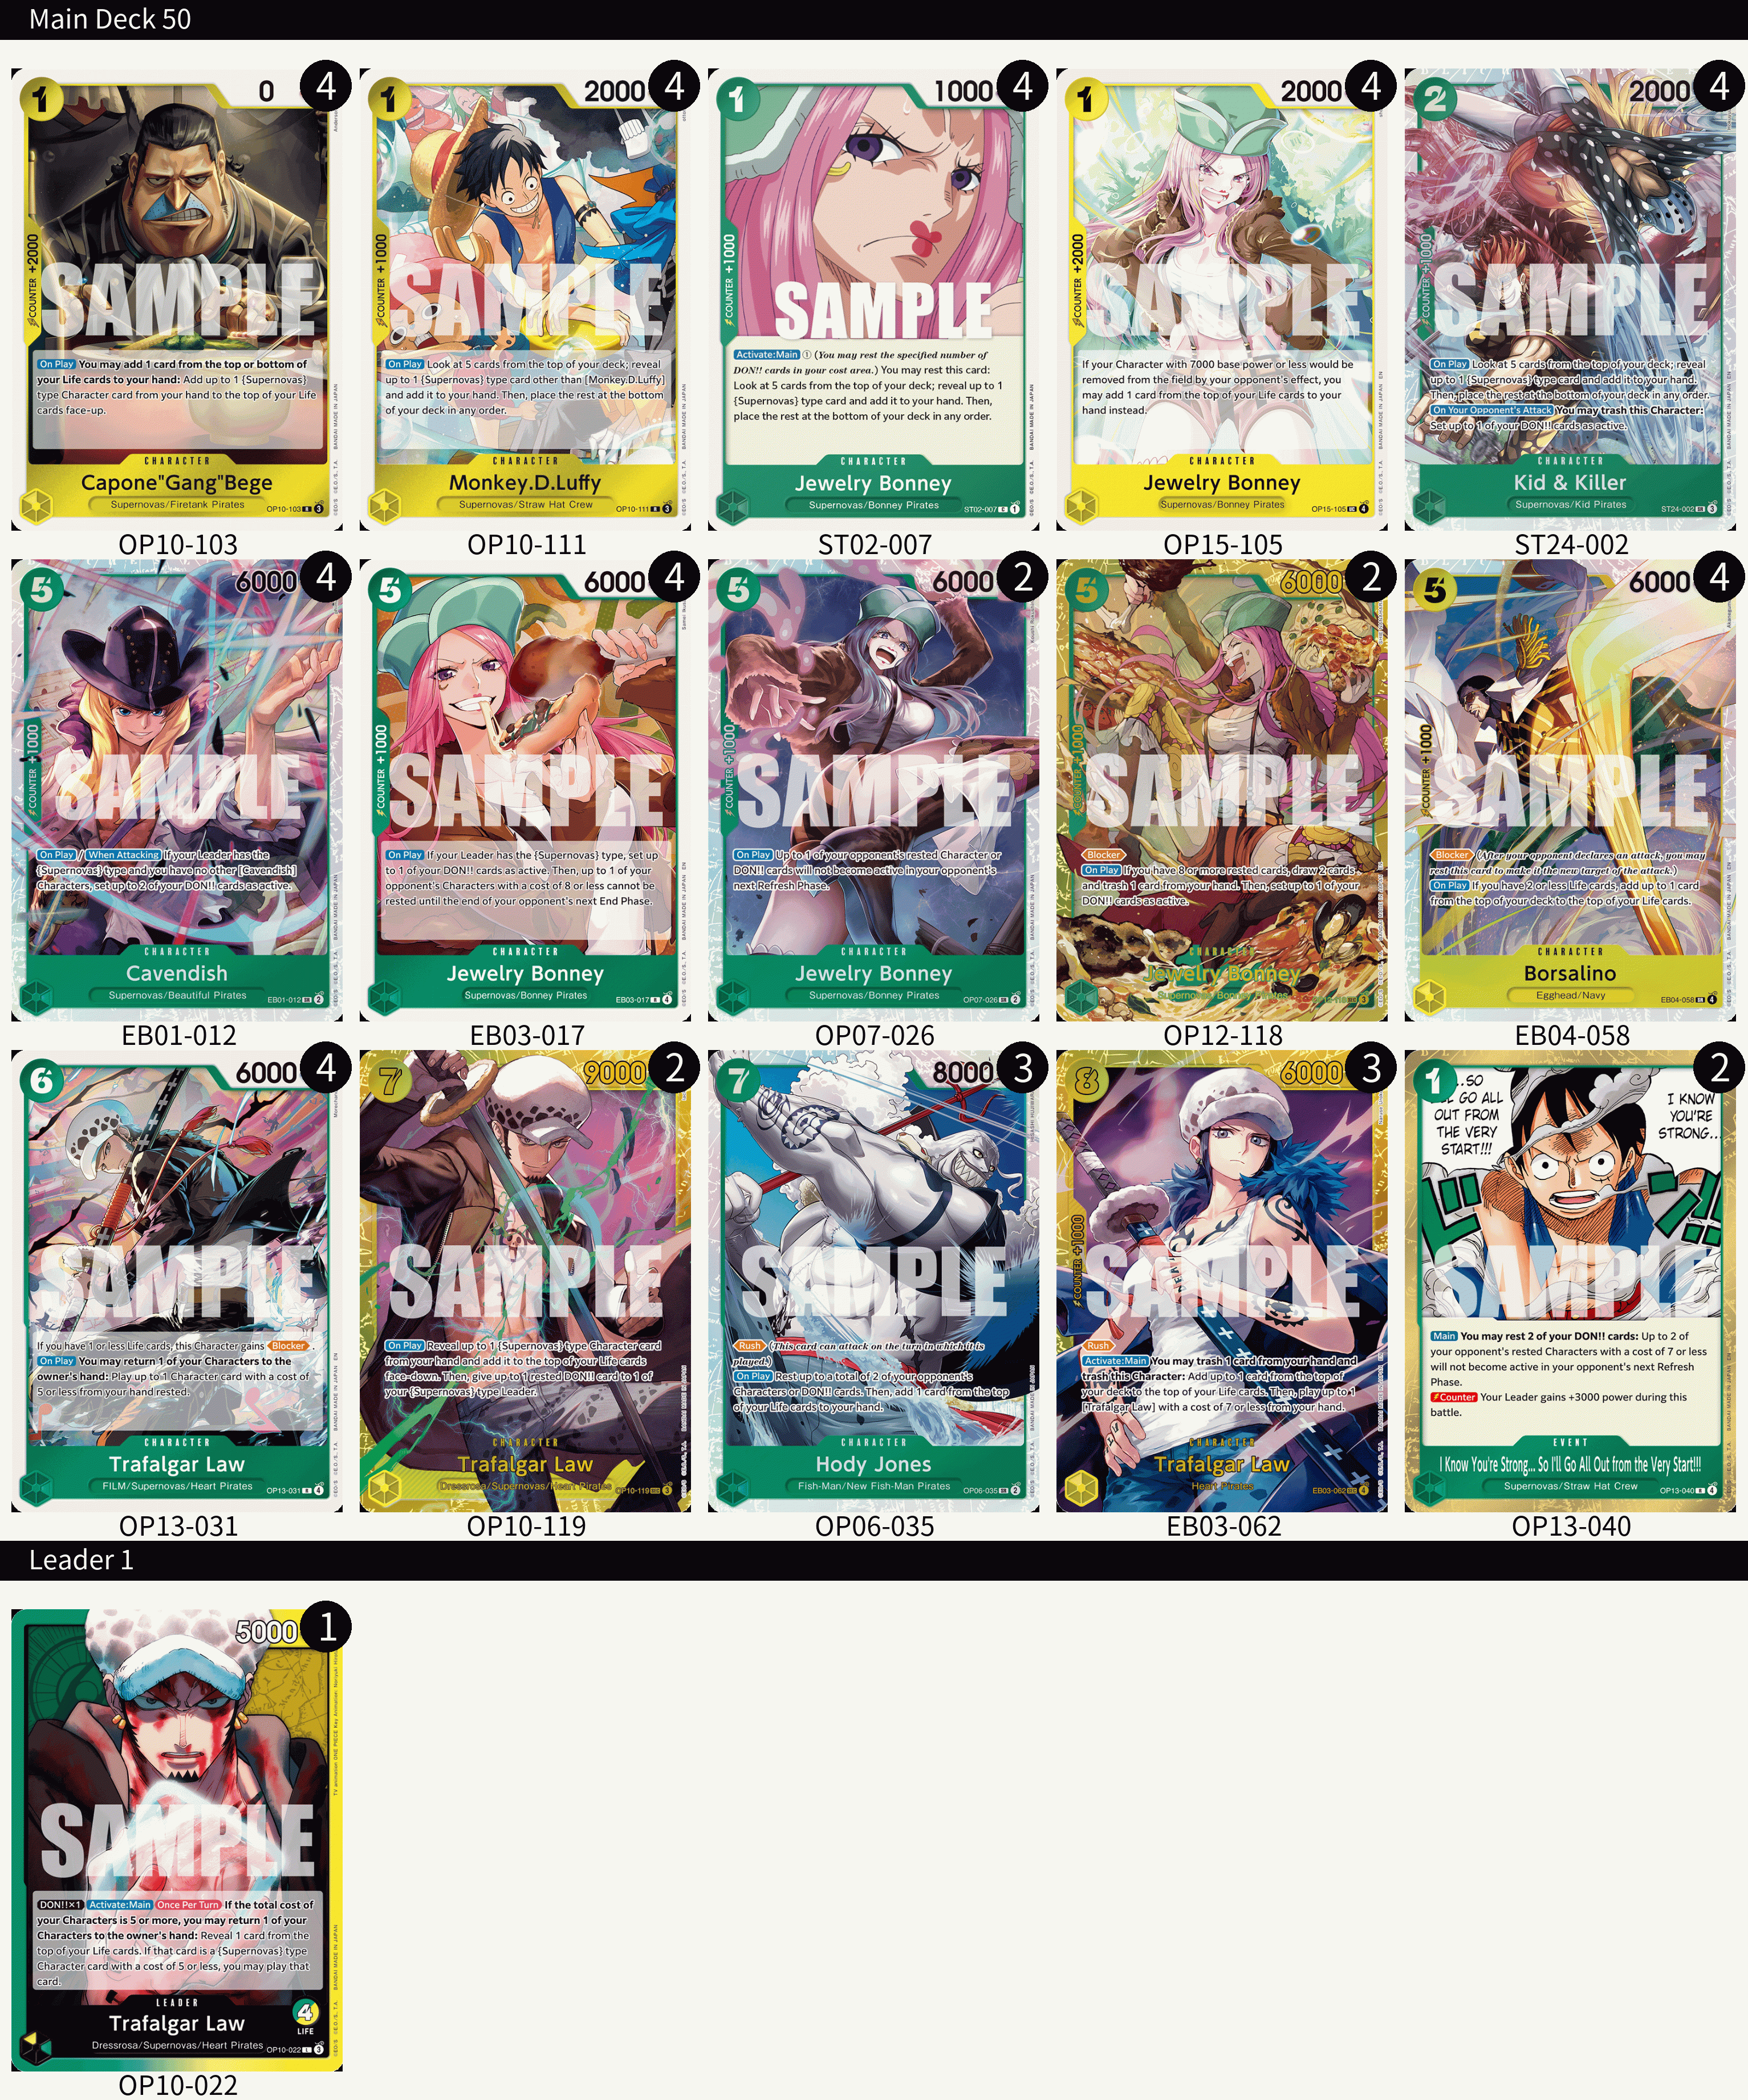
2.3. Example Lists
2.3.1. OP15
 🡮 Amy’s OP15 Version 16
“I like to play more aggressively, aiming to out on the first or second 10d turns. As such, I chose to include 4 of 6c and 2 of 7c, as 7c feels rather slow compared to 6c. I chose Perona over Bonney since it finds Femlaw and only costs 1, which is much easier to play out at any point during the game, and is much better fo the Turbo Cavendish strategy. Hody was chosen over DMG since it hits slightly harder most of the time. It is a really good card for Lucy. As for the playset f Freezebon, I found that I critically needed it in certain matchups to prevent plays like 7c Zoro or I am Whitebeard, just to name a few. I really wanted to see it, and as a result, I chose to play 4. Borsa is just a cracked card which can be turbo-abused in this deck; I can’t say much more about it All Out rounds out the list as a solid 3k counter event, which can help alleviate pressure against aggressive opponents.”
In the end, Shimona played a similar list, with 2 Freezebon swapped for 2 Drake.
![]() 🡮 Shimona’s OP15 No Borsa
🡮 Shimona’s OP15 No Borsa
“This list aims to be more consistent, with no unsearchable pieces. More Femlaw and 7c can make up for the healing lost with Borsa. Drake is great tech into any leader who utilises low cost Blockers or has important low cost pieces, such as Girl in Nami. He can also be used to fulfill the conditions for a 4d LA use. The higher number of 2k counters also allows for better counter game and makes it easier to protect the board. Lastly, Perona is very consistent with a total of 27 targets, having an extremely low whiff chance.”
 🡮 Skepas’ Store Regional 2nd Place3
2.3.2. OP16
3. Gameplay
3.1. Example Playlines and combos
Listed below are some example playlines and combos suitable for particular amounts of DON!!, and hence turns. Some are also applicable when more DON!! is available during the turn. For instance, any 6d line can also be played during a 7d turn. Keep in mind that these are examples; it is up to the player to come up with the best line of play for the situation they are in. These examples, more so, serve to show some of the things this deck can do. Therefore, it is not necessary to learn them by heart. However, it is beneficial to understand how the pieces interact with each other, like in the examples, so that a creative mind can make the most of each situation.
In any of the examples below, if any DON!! remains active at the end of the line(s), they may be used to additionally search with if there is space on the field, or to swing taller with the leader, for instance.
3.1.1. 4-DON!! Turns
🡮 4d - Turbo Cavendish
This is often the best-case scenario for the early game, as it establishes Cavendish early. The goal here is to set up bodies on the field for a total cost of 5, whilst being able to stack life, to then LA. Most of the time, this entails searching with the first 4 DON!! for Cavendish, Bege, searchers, or any other low-cost bodies which can help satisfy the cost requirement for the LA. Then ideally, Bege is used to stack Cavendish into life, after which the last active DON!! is used for the LA. The mulligan is often decided based on whether such a play is feasible. However, it is important to keep the rest of the game in mind as well.
After Cavendish is established, the 2 extra DON!! obtained can be used to search more, play 1c Bonney, or swing taller with the leader.
If it is not possible to stack life, yet it is possible to gather a cumulative cost of 5 on the board in time, it might be an option to “gamble”, meaning to fire the LA blind and hope a 5c Supernovas body is on life.
3.1.2. 5-DON!! Turns
🡮 5d - Standard Cavendish
Playing Cavendish first immediately satisfies the LA’s cost requirement, so earlier searchers do not necessarily have to remain on the board. Ideally, life is then stacked using Bege with any 5c Supernovas character to be played out using the LA afterwards, such that 2 5c 6k bodies are established in the same turn. This is one of the more obvious plays this deck offers. Stunbon and Freezebon are strong candidates. Which option is stronger depends on the situation.
This line is also playable during the 6d turn, in which an extra DON!! is available to search with before playing Cavendish. Alternatively, Cavendish can be played out of 6c instead, with the rest of the line naturally following.
3.1.3. 6-DON!! Turns
🡮 6d - Standard 6c
6c can be thought of as the equivalent of LA without needing to “spend” a life to play the extra body. Here, an entire turn is given as an example, before which the 4d - Turbo Cavendish line was successful. Similar to the 5d - Standard Cavendish playline, Stunbon and Freezebon are strong candidates to play from 6c. It is usually not recommended to play a body from life using the LA again here, which might leave the player too vulnerable if a heal on the 8d turn is not guaranteed.
🡮 6d - 6c into Cavendish
If Cavendish was not established during the 4d turn, it is usually played from 6c during the 6d turn, after which Stunbon or Freezebon can still be stacked into life and played with LA. This idea is similar to 5d - Standard Cavendish, except Cavendish is played from 6c. If 6c is not in hand, or Cavendish needs to be active during the opponent’s following turn, the turn can be played out as 5d - Standard Cavendish.
🡮 6d - Turbo
Playing Borsa from 6c allows for the LA to be used to play another body from life without going net down in life by the end of the turn, such that 3 bodies can safely be played in this singular turn. This effectively is a 19 or 20 DON!! play for the price of 6 DON!! and 0 life!
3.1.4. 7-DON!! Turns
🡮 7d - Standard 7c
This is one of the more “on curve” kinds of plays. 7c is basically a “LA setup” card, as it heals a Supernovas character into life and gives a rested DON!! card to the leader. By the end of the turn, the net life-loss is 0 if the LA is used, which is beneficial, whilst establishing a 6k and a 9k body. This is a strong play against leaders which can grow taller, such as UY Nami, RP Roger, RY Bonney, etc.
3.1.5. 8-DON!! Turns
🡮 8d - Standard FemLaw into 6c
A fairly standard line utilising FemLaw and playing 6c from it. Any previously discussed 6c plays are applicable here. The benefit of playing FemLaw instead of playing any 6c line is that FemLaw brings an extra rush swing and heals. This helps greatly with both offence and defence.
🡮 8d - FemLaw into 6c Replay
6c can be used to replay an already established body, such as Stunbon or Freezebon, to fire the On-Play effect again. One such way is by playing Femlaw, swinging with it and the body which is to be replayed, then playing 6c from Femlaw, replaying said body. In principle, just playing a 6c is sufficient to execute this idea, such that it is not necessary to have Femlaw to replay bodies with 6c. Playing 6c through Femlaw heals a life and swings wider; however, sometimes it may be more beneficial to play 6c raw as it costs less DON!!, such that larger swings can be produced.
🡮 8d - Turbo
This is essentially the same as the 6d - Turbo line after 6c is played from Femlaw. 3 bodies can be established from this whilst gaining net life. It is also a way to double-heal if LA is not used. This line is only possible if the player has only 1 life remaining, since Borsa can only heal when the player has 2 or fewer lives, and it is played from 6c after Femlaw has already healed.
🡮 8d - Standard FemLaw into 7c
This line is similar to the Standard 7c line, except 7c is played from Femlaw here, such that an extra Rush swing is generated and a life is healed. It is also possible to doubly heal with this line if LA were not to be used.
🡮 8d - 6c Replay
It may occur that the hand does not facilitate any good plays for the situation at hand, but the cards on the field do. In some cases, it may therefore be helpful to bounce a card such as 6c back to hand using LA, before playing it out again and replaying another 5c Body such as Stunbon to fire its On-Play again. If a body needs to be stunned desperately, for instance, but no Stunbon nor any 6c are in hand, this may be a viable play. Make sure to swing with any bodies before they are bounced back to hand.le play. Make sure to swing with any bodies before they are bounced back to hand.
🡮 8d - FemLaw Pinch Replay
This is a similar idea to 6c Replay. However, here the 6c is played out from Femlaw after it is bounced to hand. This provides an extra Rush swing and heals a life in addition. This may be effective in a pinch, when a life needs to be healed, and a body needs to be stunned, whilst keeping some offensive pressure up.
3.1.6. 10-DON!! Turns
🡮 10d - 6c Stun and Heal
This is an example of a fairly defensive turn. Even if tools such as Stunbon or Borsa are not in hand, but are on the field alongside Cavendish, 6c, and LA can be used to play 2 of them again. This is just an example that illustrates how tools can be used creatively together to try to satisfy the needs in the moment sufficiently. Many more creative lines are possible. “It’s almost as if the book says, ‘Here are the toys, now go and play’” ~Adam Neely (2018)4.
3.1.7. Finishers
🡮 12 DON!! Finisher
According to rule 6-5-5-4, any DON!! given to a body is returned to the DON!! area rested if that body is bounced to hand, up to 2 of which can then be restood by Cavendish such that 2 extra DON!! become available to swing with5. The most efficient use of this idea is when 2 DON!! are given to a body to swing with before that body is bounced to hand.and.
🡮 Bounce and Stun
In a pinch, Stunbon can be bounced and played again to stun a Blocker. If Cavendish is still on the field, it functionally only costs 2 DON!! to stun a Blocker. The effectiveness of this lethal line depends on whether the opponent blocks the initial swing with Stunbon.
🡮 Free Extra Stun
Bege can be used during lethal turns to stack into life a body that aids with the lethal. If there is a Blocker on the board, it can be stunned ‘for free’ this way after LA, since Stunbon restands a DON!! as well.
Pre-rotation, Restand Law was a popular choice to stack into life during lethal turns to cheaply restand Cavendish and swing incredibly efficiently.
🡮 Grab Hody or DMG
LA is used on most turns to bounce characters back to hand for various reasons, revealing life in the process. If Hody or DMG, for instance, are necessary for lethal, but are not in hand, yet one of them sits at the top of life, Bege can be used to grab it for 1 DON!!. This is another reason why having Bege in the late game can be helpful at times.
3.1.8. Other
🡮 Searcher Looping
If a card is desperately needed, and a search does not find it, LA can be used to bounce the searcher, such that it can be played again to search deeper. 1c searchers are the most suitable due to the low cost committed to the searches. In principle, any card can be looped like this if necessary, and if there is enough DON!! available.
3.2. Matchup Strategies (OP15)
OP16 strategies are a work in progress.
3.2.1. P Enel
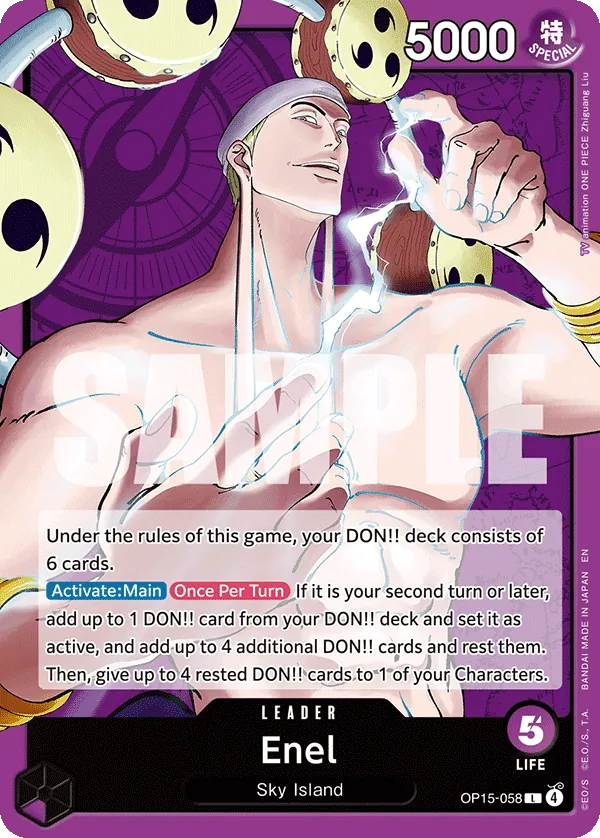
P Enel is one of the deck’s toughest matchups. The large amount of early game swings, powerful Events that control the flow of the game, and the tall 6c Enels make it extremely difficult to defeat. Starving Enel is important to increasing the chance of survival. Swinging into the board over the lead should be prioritised since it always reduces tempo for the opponent.
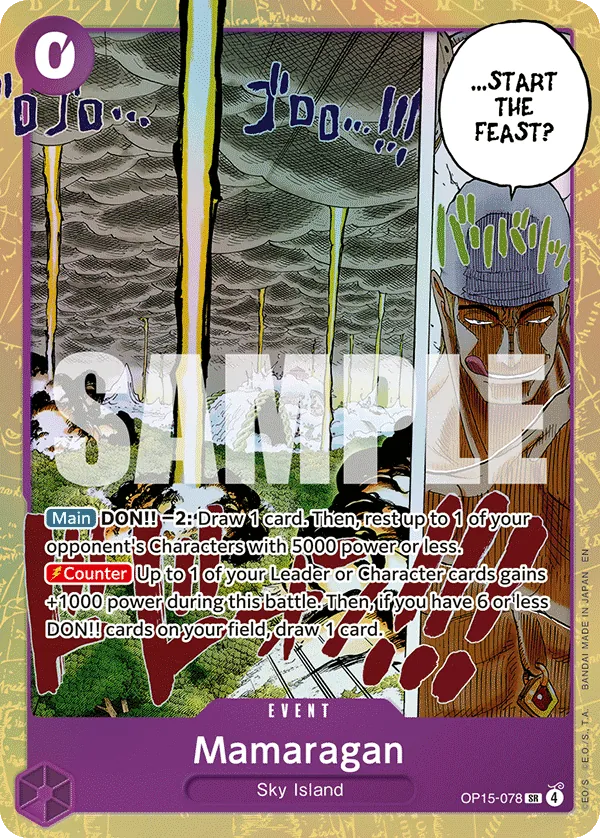
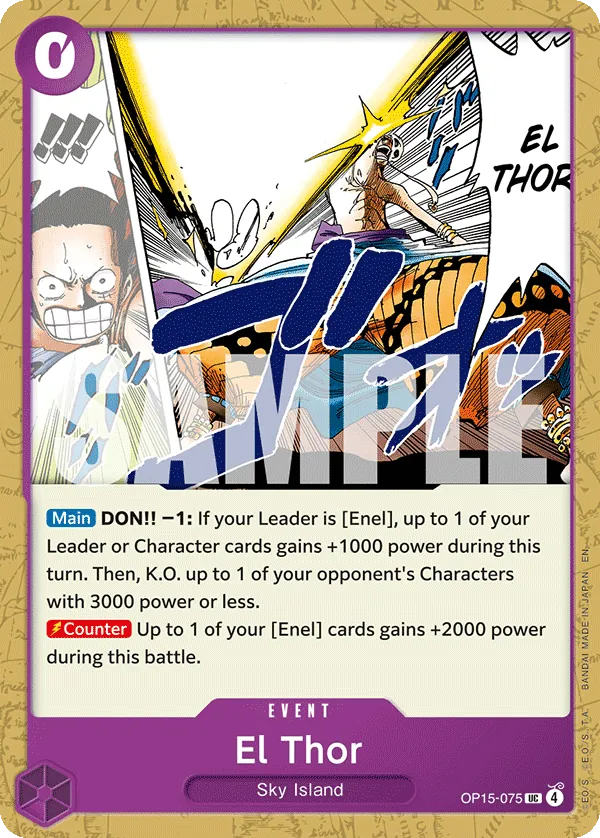
The first obstacles to face are Enel’s 0 cost events, specifically Mamaragan and El Thor. El Thor will KO the setup for the Turbo Cavendish line, and Mamaragan can rest a character to then swing into it. This makes Law’s even curve rather difficult to pull off. It is therefore advised to go first. The odd curve allows for the 5d - Standard Cavendish line to be executed, which does not require any prior setup, as well as Enel’s 6c drop to be delayed.

Around 5d/6d is when the next threat arises. El Thor in combination with Gamma Knife allows Enel to KO any body with 8000 power or less, with Cavendish as its prime target. Removal protection is very useful here. 1c Bonney should be used with caution, though. Enel may have multiple El Thor in hand, and taking several lives to protect Cavendish runs the risk of Enel switching up and swinging everything at lead. Gamma Knife can also be used in combination with Mamaragan to rest and easily swing into Cavendish, or it can be frozen by Lightning Dragon after Kiten and Mamaragan.
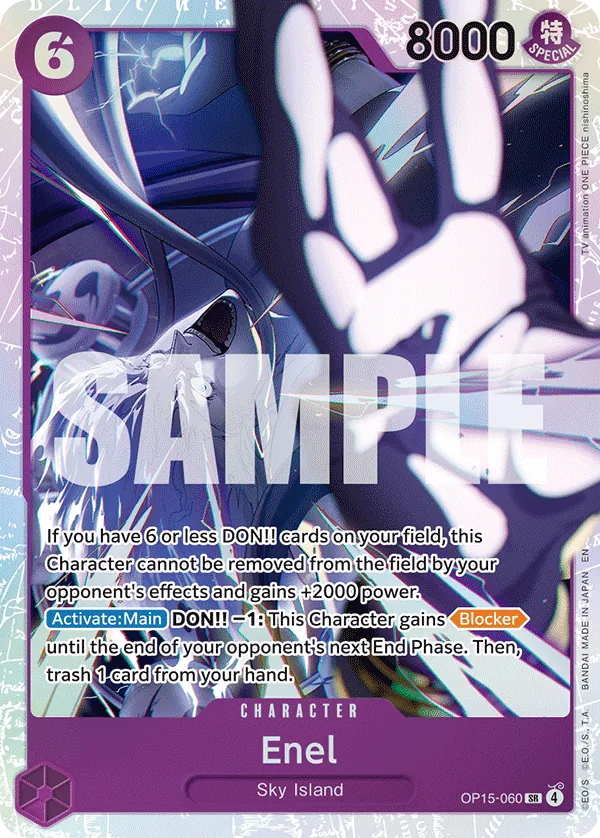
Once the 6c Enels are played, Law has a better chance of success. It is an entire turn spent on a body that can easily be locked down by Stunbon. Blocker Enels, especially, can come with this drawback for the opponent since a card is trashed to gain Blocker, which then is completely invalidated by a stun. Chaining 6c into Stunbon is rather effective in preventing Enel from attempting lethal when the late-game is approached, while picking away at the opponent’s life. Hody or DMG are great for ensuring lethal, due to the prevalence of Blocker characters in Enel’s deck (4c Franky, 4c Reiju, Blocker Enel, etc.).
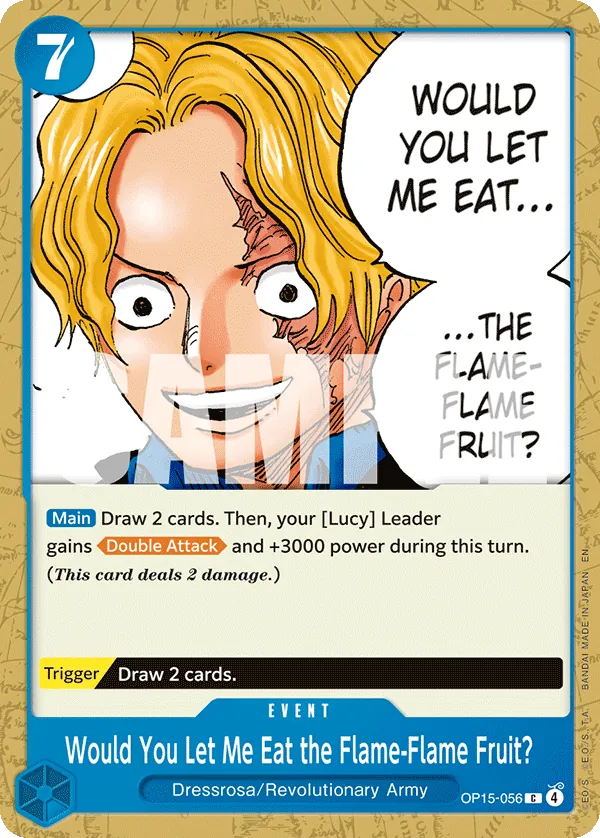
3.2.2. RU Lucy
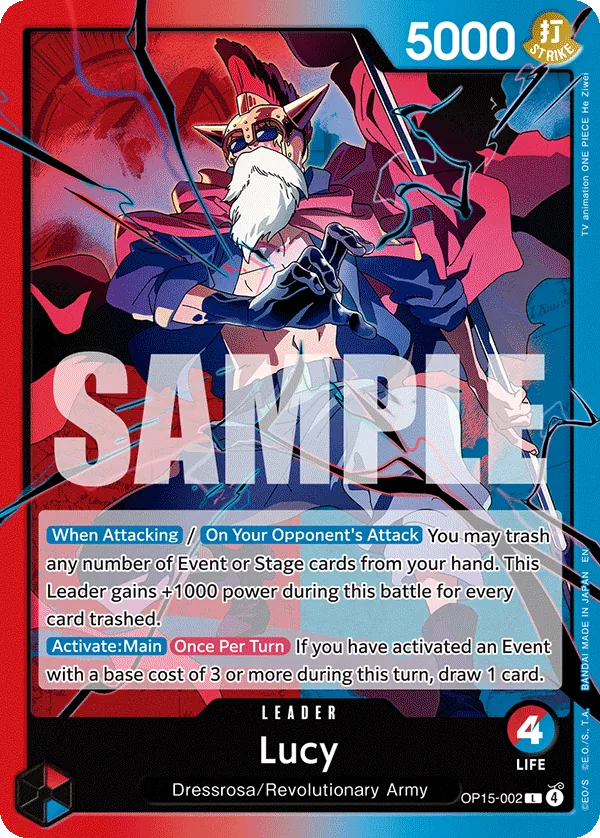
Lucy, like Law, is a deck that thrives on high tempo. By removing the opponent’s board through powerful events while drawing heavily, Lucy keeps up the tempo throughout the match. It is therefore rather important to have removal-protection and enough counters to protect the board when facing Lucy. Stunning and freezing the opponent’s board is vital.

4c Cavendish is Lucy’s main draw engine, and one of the deck’s most vital pieces. Its When Attacking effect allows for the hand to be filtered and increased in size, which is vital for Lucy, as it runs a lot of events and bricks. It is therefore a prime target for attacks, removal and stuns. Even though Lucy typically has a large hand, its LA can not be used to protect characters, such that the amount of counter available to protect characters is lower than it seems.

Barrier-Barrier Pistol is a card that can doom GY Law very early on. Having Cavendish bottom-decked on 5d/6d immediately after it’s played is devastating for the deck and will severely limit the amount of possible plays. Moreover, having searchers removed such that the 4d - Turbo Cavendish line is denied is a large tempo loss. Removal-protection must be established before Lucy has the chance to use it. It can be triggered, too, so protection should always be established before swinging.
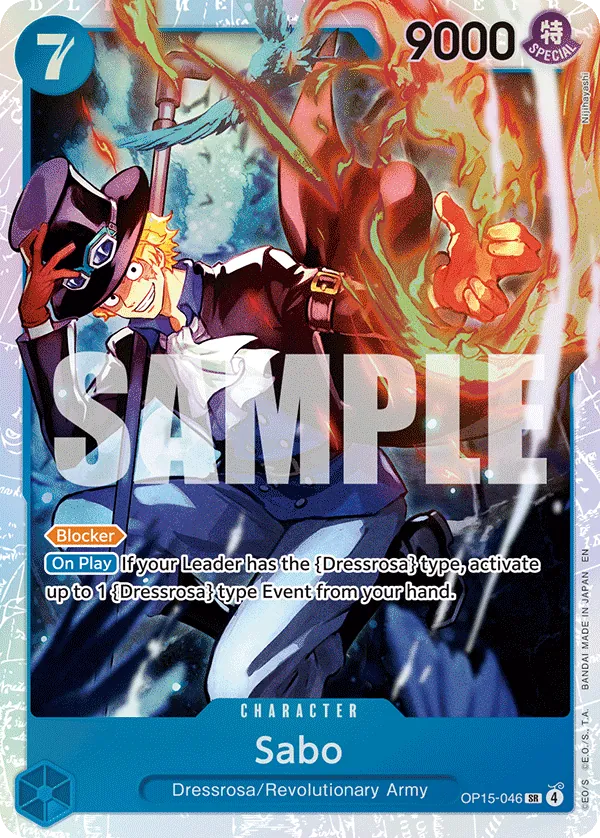
7c Sabo is one of Lucy’s strongest pieces. It develops a tall Blocker that activates one of Lucy’s very powerful Events, its 7c events in particular. Lucy wants to establish these on 7d and 9d to develop a strong field to use with 10c Roger, such that it is preferred for GY Law to go first. Stunbon should be used to deny Sabo from blocking and swinging, increasing the pressure on Lucy while reducing the potential for a clapback. Before Lucy is to be taken down to 0 life, it should be considered whether it is possible to survive 10c Roger. It might be more advantageous to swing at the board and stun what’s left, and finish the game on the following turn. Hody or DMG are extremely useful in this MU because of Lucy’s many Blocker characters in the endgame.
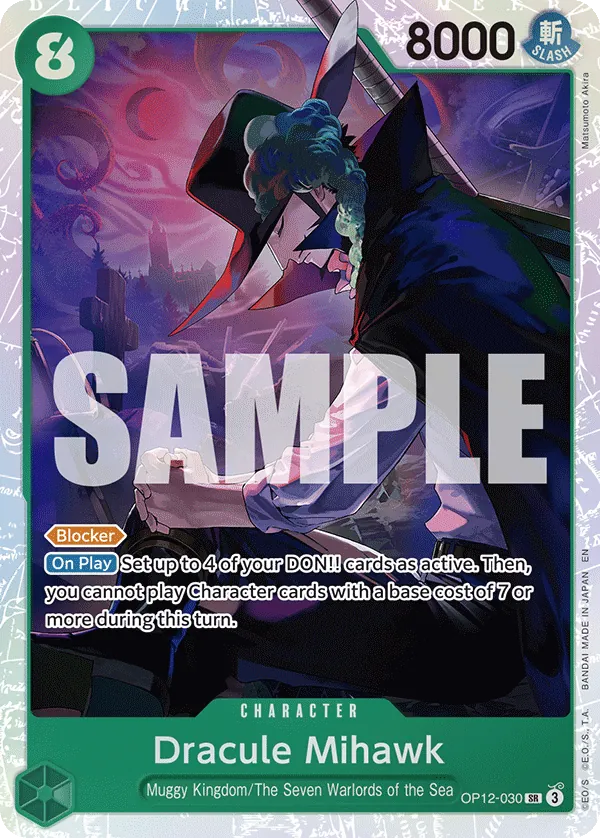
3.2.5. G Mihawk
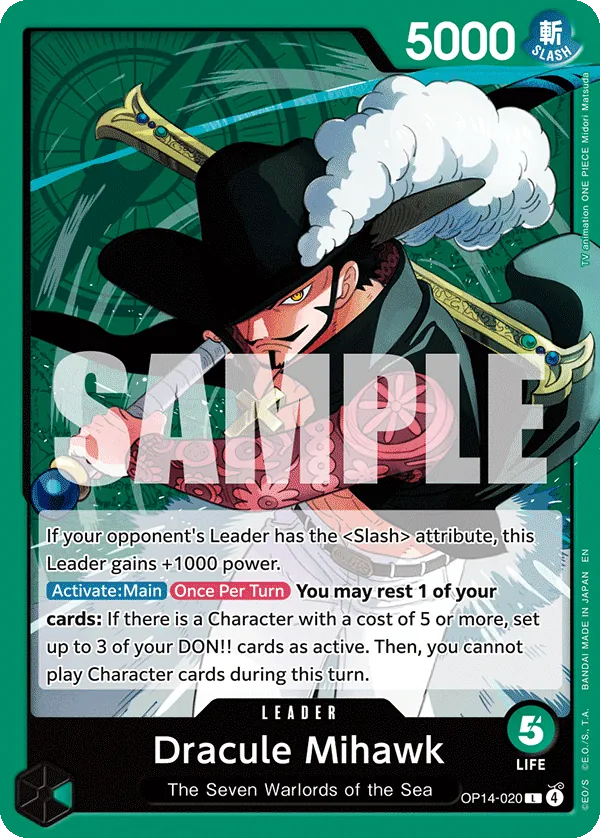
Mihawk is a rather tricky deck to approach due to it essentially having 6k power, as Law is of Slash attribute, and a wide range of stunning and freezing options at its disposal. Its Activate:Main ability restands 3 DON!! every turn, always allowing Mihawk to use Events like All Out and Electrical Luna, or keep DON!! available for counter events. Law’s board is quite vulnerable to being frozen due to mostly employing and swinging with mid-cost characters, such that the board can easily be disabled if it’s too exposed. Players might therefore have to consider whether it’s worth it to swing with each character. It may sometimes be better to swing taller with fewer characters to spare one or a few from being frozen.
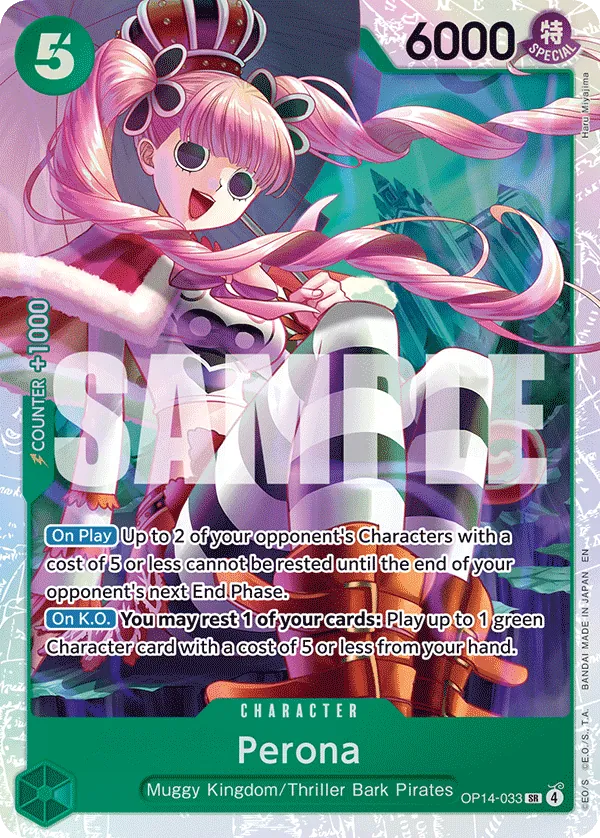
Early on, Mihawk focuses on getting various 5c characters out that can stun or freeze, such as Carrot, Perona or Freezebon. These threats should be dealt with accordingly by KOing or stunning them. Note that Perona has a powerful On K.O. effect and might therefore not be a good attack target. Mihawk develops its board rather slowly, so putting a dent in it will slow them down considerably.
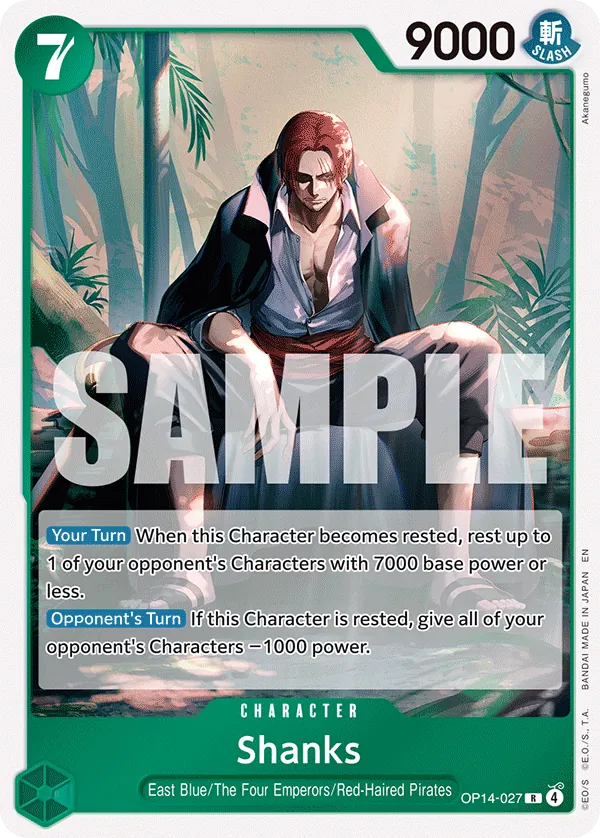
On 7d is when one of Mihawk’s most imposing cards can be deployed: 7c Shanks. This hulking body can rest anything of 7000 Power or less when it is rested, thus by the opponent declaring an attack or when it is used for Mihawk’s LA. It can target almost any body in GY Law, including Blocker characters, and to top it off, it also debuffs the entire board by 1000 Power when rested, such that most bodies in Law suddenly won’t be able to swing without any DON!! attached. This makes Shanks a priority target, first and foremost for Stunbon, which can neutralise its effect. Mihawk greatly benefits from playing Shanks, and later 9c Mihawk, on curve, which makes going first the best choice for Law. It may be strong to establish 7c on 7d, such that it can swing into and possibly K.O. Shanks, allowing the rest of the board to swing into lead easily, and nullifying the opponent’s prior turn if successful.
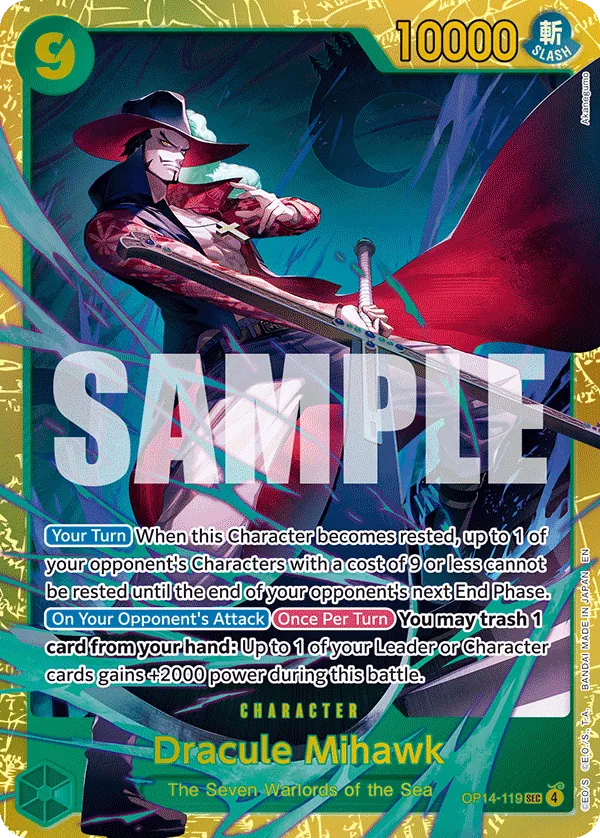
The next threat appears from 9d onwards: 9c Mihawk. The great stat line, the ability to stun almost every card in the game, and the option to pitch bricks for 2k counter make this card a true menace. It can easily shut down any big body or disable any Blocker characters when the opponent attempts lethal. While it isn’t an eligible target for Stunbon due to its cost, it is rather vulnerable to being frozen by Freezebon, which it can’t punish. The On Your Opponent's Attack can be rather annoying, but Mihawk does run the risk of going low on cards in the late game. If this piece is played on curve, it will most often lead into Law & Bepo the following turn, making it very difficult to out. If the game reaches this point, the options depend on the board state. If Mihawk is low on life and a strong board remains, going for lethal might be the best choice before the opponent can deploy too many top-end pieces. If 2 or more lives remain, and 9c Mihawk stays on the field, swinging at life might be futile. If lethal isn’t achieved within the same turn, the clapback will be very hard to counter. Instead, it should be considered whether it is possible to clean the opponent’s board. Mihawk has several counter-events that only apply to leaders, such that the available counter for protecting the board might be fewer than it seems. If the opponent tries to swing at life in retaliation, there is the option of healing through Femlaw or Borsa. Hody and DMG once again shine for closing out games due to being able to rest active DON!!, turning Mihawk’s counter Events into bricks.
3.2.3. UY Nami

Nami can be viewed as a pseudo-“7k” leader, since its On Your Opponent's Attack ability allows for a card to be pitched as counter, such that it gains +2k power for the rest of the turn. As such, this ability is typically activated during the first swing. Notably, a DON!! is required to be given to the leader for this effect, such that it is punishable either if the opponent is not able to give a DON!!, or if it is forgotten.
This ability significantly impacts which lines of play and swing patterns are effective. Since most of GY Law’s bodies are of 6k power, it requires DON!! to be given to them to form effective swings. It is ideal to mostly swing for 7k power, as this does not commit too much DON!! to the swings, such that particular effective playlines are still possible, whilst always demanding counter from the opponent. As such, it is important to determine which swing pattern is the most effective balance between demanding counter from the opponent, and making effective playlines. If it is not possible to pressure life with each swing, it can still be effective to attack bodies of lower power with remaining lower swings, such as 4c Perona, which has 5k power, to pressure the opponent and demand some kind of compromise, be it in counter or resources on the field.

Speaking of Perona, it is a fairly dangerous card which often sees play either from hand or from its trigger. Most bodies in GY Law’s deck are targets for its effect. It may, therefore, be intimidating to attack it because of its On-K.O. effect. However, this can be played around: Its On-K.O. ability is effectively useless if all the bodies the player intended to attack with have already swung. Attacking Perona with the last intended swing, after pressuring life, for instance, is therefore incredibly effective.
The player should also be wary of its trigger. Another Perona will likely be the target of the trigger if there is one in the trash, which typically results in a body of the player being stunned. Therefore, checking trash often during the game is be quite helpful, especially when attacking for lethal.
Note as well that UY Nami plays Zeus for removal. Critical cards such as Cavendish are vulnerable to this threat. It would therefore be favourable to have 1c Bonney in play to mitigate this threat.
UY Nami usually plays ‘on-curve’, that is, the player can expect the opponent to make particular plays on particular DON!! turns. It is recommended for players to study popular lists beforehand to make educated decisions for which targets to stun and when to freeze DON!!. Note that 5c Nami often isn’t a threat since it is highly likely its conditions will not be fulfilled, as GY Law typically takes the first hit and uses a life to LA before 5c Nami can be played.
3.2.4. RU Ace
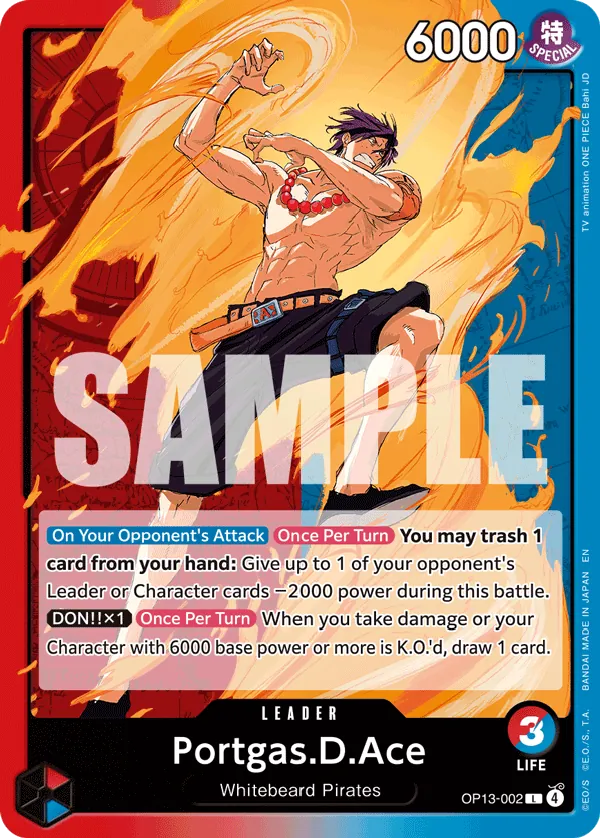
As a deck with massive card draw and powerful endgame, RU Ace can be a tall task to overcome. The opponent’s board can become quite overwhelming in the later stages of the game, so lethals are typically attempted sooner rather than later. The first part of the LA turns bricks into 2k counters, meaning the deck can run more bricks than usually comfortable. The second part allows Ace to draw a card once per turn when damaged or when a character with 6k base power or more is KO’d. This essentially means that 2 cards are added to the hand when a swing lands at the lead, which can quickly lead to ridiculously big hand sizes. It also means that a character being KO’d isn’t as big a tempo loss since hand size goes up in exchange. Ace’s most essential pieces are of an even cost, so going 2nd is the way to go for Law.
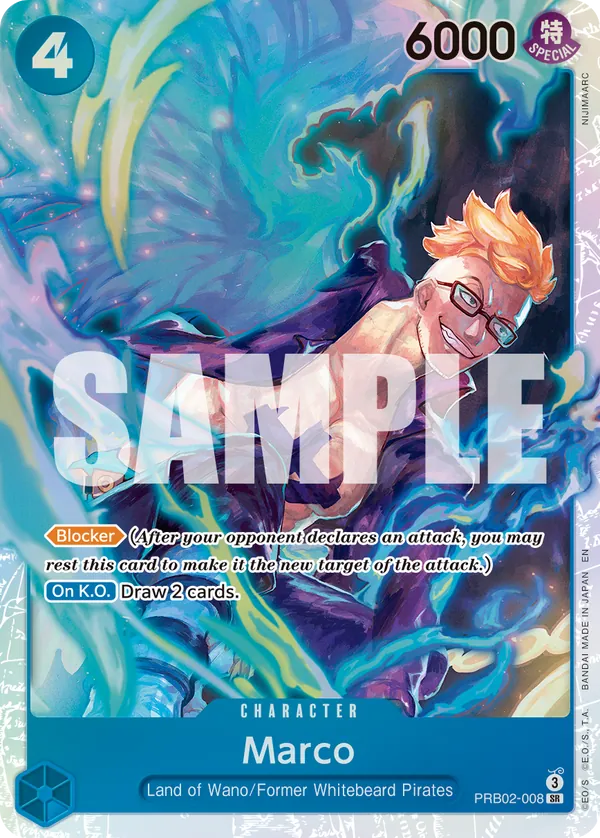
The first character to take note of is 4c Marco. It’s a Blocker with the On K.O. ability that draws 2 cards, which, in combination with the LA, draws a total of 3, an insane tempo gain. Luckily, Law has a couple of pieces to deal with this. First and foremost, Stunbon, which prevents Marco from resting, and secondly, 3c Drake, which can rest 4c and below characters if the opponent has the same amount of life cards or more. When going 2nd, it isn’t unusual to be down to 2 life at 4d (if the 4d - Turbo Cavendish line succeeds), so this condition shouldn’t be too hard to fulfil.

The next piece to be on the lookout for is 6c Jozu. It bounces one of Ace’s own characters (most often a searcher or 1c Otama), meaning it is hand neutral, and then bounces a 6c or less. Its prime target is Cavendish, such that it is of utmost importance to for removal-protection ro have been established before 6c Jozu can be played. Another way this threat can be dealt with is for Freezebon to freeze a don on 5d.
If it were possible to take 2nd, Ace will try to play 7c Zoro on 7d to become an 8k lead, making it very difficult to land a hit. Once again, Freezebon is the solution. If Zoro is prevented, Ace will be very vulnerable to aggression on 8d. 3 to 4 6k bodies should have been established at this point. The best choice here may be to just DON!! up and swing hard. With Cavendish on board, it is possible to utilise up to 10d for this purpose. Swinging 8 8 8 9, for example, would force Ace to take 1-2 lives and heavily go down in hand size. If 0 life is reached, lethal is possible on the next turn if Hody or DMG are available. Ace is generally a slow deck, so a heavy clapback here is unlikely.
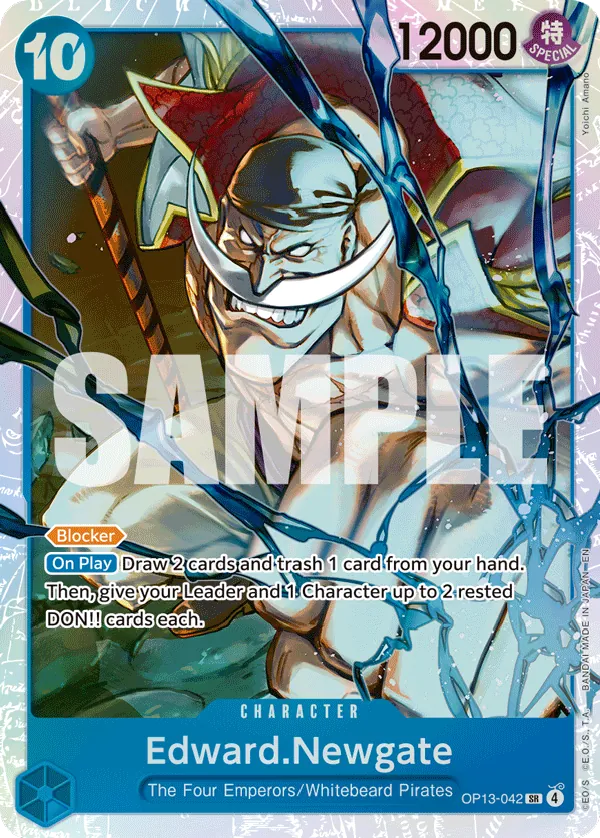
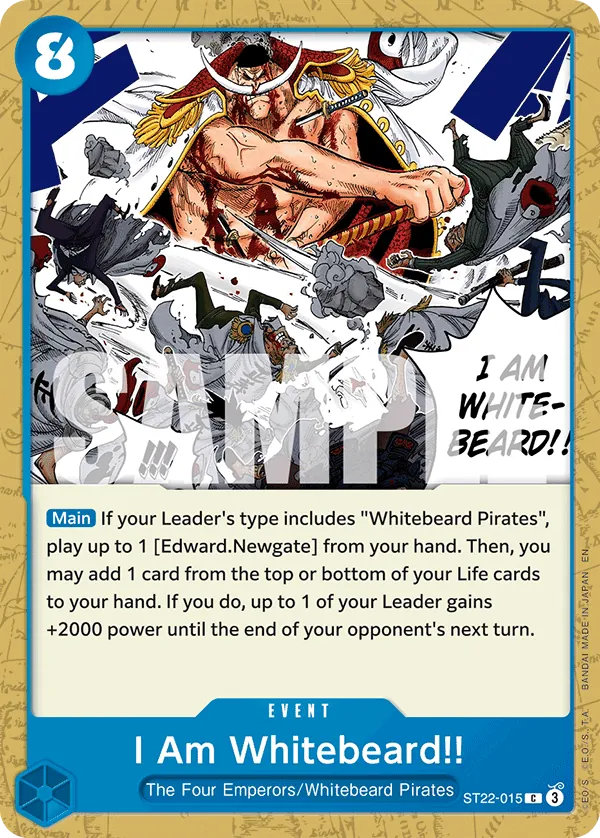
From 8d onwards, the big problems start to arise. The I am Whitebeard Event allows Ace to play a 10c Whitebeard on 8d/9d, essentially acting like some form of ramp. From here on out, Ace will just keep chaining Whitebeards until lethal is possible. 1 or 2 Blocker whitebeards are possible to deal with, but past that, it practically becomes impossible to break through and go for lethal. It is therefore most optimal to out before Ace’s second 10d turn.
The second part of the Event allows Ace to take a life in exchange for gaining 2k power, and with a 12k Blocker simultaneously deployed, it’s often impossible to meaningfully swing the following turn. This is why it is imperative for Ace’s life to be reduced to 1 before this point. If the second part of the Event is activated here, Ace becomes vulnerable to DMG and Hody since all remaining DON!! can be concentrated on a single swing. If 7c has been deployed earlier, lethal becomes much more viable since DMG can be followed up with a 17k swing. When Ace has built enough board, 10c Roger will often be deployed to ensure lethal, so players should be wary of this when reducing the opponent’s life to 0.
3.2.6. RG Luffy
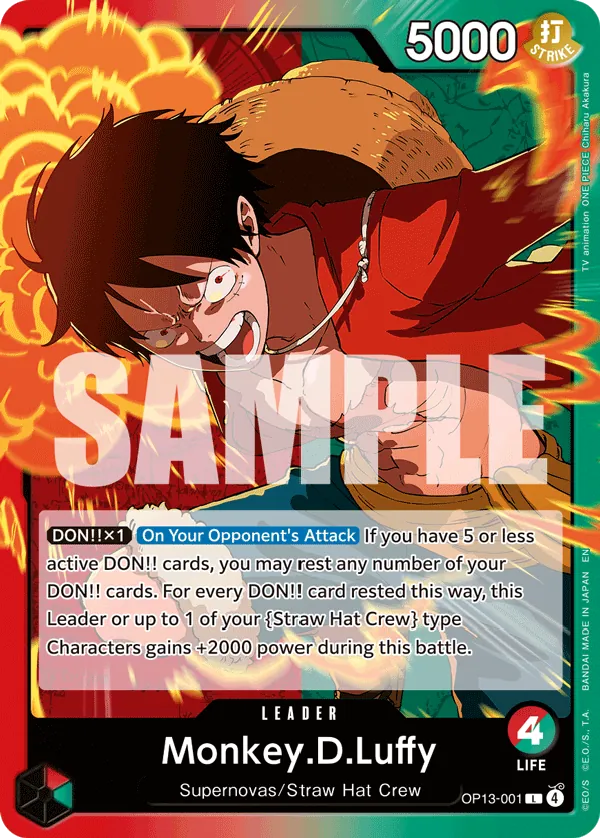
On the surface, RG Luffy seems like an incredibly rough matchup. GY Law tends to swing with 6k power a lot, which RG Luffy can perfectly counter with DON!! using its LA. As a result, it can play more bricks and fewer 2k counter cards, however. Therefore, it is recommended to swing with 7k power if possible, as this asks a card from hand or an additional DON!! to be rested, the latter of which is more inefficient. Multiple such pokes can pressure the opponent. Take note whether a DON!! is given to the opponent’s leader to begin with, as its LA requires one. If this is not the case, multiple pokes can put a lot of pressure on the opponent.
Take note of the number of active DON!! of the opponent before deciding to swing. It is quite ineffective to swing with bodies if those can fully be countered using DON!!, leaving them vulnerable to attacks or Electrical Luna.
The 6c Monkey.D.Luffy with Double Attack can be a serious threat, since GY Law can be rather fragile on Life. As such, it is quite effective to stun it using Stunbon. Freezebon could also be used to deny this play altogether by freezing one of the opponent’s DON!! for their 6d turn.
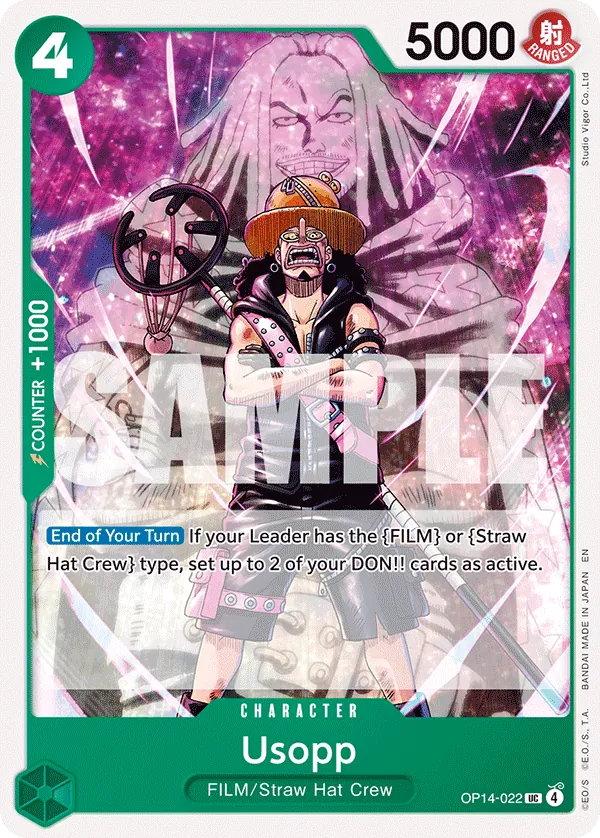
4c Usopp is a strong card in RG Luffy’s arsenal. It will likely not swing if there is too much board pressure since it provides a lot of value with its End of Your Turn ability. If it does swing, it could be beneficial to attack it instead of the leader, as they are both 5k in power. It can be a large benefit if this card leaves the field.
 The calculations for lethal are somewhat different from other matchups simply due to the combination of RG Luffy’s LA and the 2c Charlestone event. It costs 2 to play, gives 4k counter power, and restands 3 DON!!. Blindly swinging for lethal without taking this card into account can destroy any chances of winning. To play around this card, a good understanding of the rules is required.
As of the moment of writing, rule 7-1 in the comprehensive rules dictates that any On Your Opponent's Attack effects (7-1-1-3) are processed before the counter step (7-1-3), meaning that the restood DON!! from Charlestone can not be reused by RG Luffy’s LA to counter the same attack once it is played5. Those DON!! can only be used again for the next attack. This is the open window which will be exploited in the lethal calculation.
As such, the goal is essentially to produce a very large swing as the definitive lethal swing, since this renders Charlestone ineffective. The +4k counter power Charlestone provides is equivalent to the counter 2 DON!! can provide with the LA. This effectively turns Charlestone into a brick in hand, and likely another card as well, which would have been pitched to allow for 3 DON!! to be restood.
Therefore, the most effective strategy, assuming the opponent has no extra life or Blocker characters in play, is usually to poke them with 5k and 6k swings, demanding either counter from their hand or DON!!. When a sufficient amount of DON!! is rested, and counters are played from hand, a large swing with as much DON!! given as possible produces the best chance at achieving lethal, since RG Luffy tends to include more bricks and fewer 2k counter cards in the deck. While the pokes discourage the opponent from doing so, Charlestone may be used to counter one of them, which is one of the better plays the opponent actually has in this situation. It is up to the player to evaluate the number of pokes that can be dared before the lethal swing is made and avoid Charlestone from being played at all.
In some situations, when only 3 of the opponent’s DON!! are active, it can also be effective to play either Hody or DMG to rest 2 DON!! such that Charlestone can not be played at all.
Afterword
Hello, this is Amy speaking, or writing in this case. It’s been a while in the making, hasn’t it? I have felt compelled to write a guide for this leader for a while, ever since somewhere pre-rotation, since it’s my favourite leader in the game ever since I started playing it in OP12, and many similar questions were, and still are, asked in the GY Law channel from the One Piece Trading Card Game Community Discord server. Instead of writing similar answers every time, I figured it would be nice if there were one central place, a reference, if you will, with answers to most of these questions. I never considered myself knowledgeable, skilled, and confident enough to commit the time to writing it, though. Then came rotation, after which the course of the deck was slightly altered, yet the fundamentals remained similar. I ended up learning a lot from and discussing with Shimona about the new strategies this deck employs. At some point, we figured it would be nice if we would make a list of turn-order preferences for multiple decks, which sparked my motivation again to write an article about this deck. I figured I couldn’t do it alone, so I asked Shimona if she wanted to contribute as co-author, and that was the point at which she decided she would put up with the terrible project host that is me and co-author this article. I’m so sorry for being so chaotic and sporadic. I truly have a deep appreciation for everyone who contributed to this guide. Shimona and Swagzaur really filled lots of gaps in my knowledge for this work, and I hope I was able to do the same not only to them, but to the reader as well. My contributions were only part of the whole work. I sincerely hope it lives up to the quality standard everyone might have expected after so frequently talking about the process of writing this. Perhaps it’s pretentious to write an afterword like this, so instead I’ll say let’s all become better GY Law players!
Useful Links
-
OPTCGLab Lethal Calculator
Valuable tool with which the most optimal lethal swings can be calculated and analysed. -
Hypergeometric Distribution Probability Calculator
Tool which calculates the probability of drawing some number of successes in a sample of a population, useful for educated decision-making during the deckbuilding process. -
gumgum.gg
Decklist database for competitive decks. -
Heart Pirates Discord Server
Community dedicated to Law leaders. -
One Piece Card Game Community Discord Server
General community with channels dedicated to each leader. The#🟢🟡op10-lawchannel is home to many of the discussions which led to the creation of this article.
Glossary
| Term | Description |
|---|---|
| #c | # cost card. |
| #d | # DON!! turn. |
| Body | Character card. |
| Bouncing | Returning a character card from the board to hand. |
| Cheating out | Playing a card without paying its full cost. |
Chump Blocker |
A low-cost, low-power Blocker. |
| Clapback | The large wave of attacks from the opponent after a lethal attempt |
| Firing | Activating an ability. |
| Freezing | Restricting a rested card from restanding at the start of the next turn. |
| Healing | Adding a card to life. |
| LA | Leader Ability. |
| Lethal | A set of attacks or a turn which aims to win the game through damage. |
| Looping | Returning a character card to hand and playing it again. |
| MU | Matchup. |
| Out | Any means possible to win the game. |
| Pieces | Cards. |
| Raw playing | Playing a card from hand by paying its base cost. |
| Removal Protection | Characters which use a replacement effect to prevent another character from being removed by effects. |
| Restanding | Setting a rested card as active. |
| Stacking | Taking then placing a life to and from hand. |
| Stat line | Cost to power ratio. |
| Stunning | Preventing a body from resting or attacking. |
| Swinging | Attacking with a character or Leader card. |
| Tall | High amount of power. |
| Tempo | An advantage of resources in time compared to the opponent. |
| Whiff | A search without a legal target in its options. |
| Wide | Many bodies. |
| Tempo | An advantage of resources in time compared to the opponent. |
| Whiff | A search without a legal target in its options. |
| Wide | Many bodies. |
Bibliography
-
David M. Lane et al., Introduction to Statistics. Accessed: Jun. 17, 2026. [Online]. Available: https://onlinestatbook.com/Online_Statistics_Education.pdf ↩ ↩2
-
‘Hypergeometric Distribution Probability Calculator’. Accessed: Jun. 17, 2026. [Online]. Available: https://stattrek.com/online-calculator/hypergeometric ↩
-
George Skeparnides [@SkepasG], (Apr. 25, 2026). X/Twitter. Accessed: Jun. 17, 2026. [Online]. Available: https://x.com/SkepasG/status/2048057113025372582/photo/1. ↩
-
Adam Neely, The 5 Music Theory/Composition Books That Most Influenced Me, (Jun. 04, 2018). Accessed: Jun. 14, 2026. [Online Video]. Available: https://www.youtube.com/watch?v=dbabDhGZAhM ↩
-
‘Comprehensive Rules’. Bandai, Jan. 16, 2026. Accessed: Jun. 16, 2026. [Online]. Available: https://en.onepiece-cardgame.com/pdf/rule_comprehensive.pdf?20260116 ↩ ↩2